If you stumbled upon this blog post you probably know what Docker is and wondering could it be useful when developing for Dynamics 365 Business Central. The short answer is yes. Let’s talk why and then I will tell you how to setup Docker and share a few great tips on using it.
Docker: why to use it?
First of all, why should you use Docker? Well, it’s really useful for Dynamics 365 Business Central testing, experimenting and working in teams. Moreover, you can make Docker container accessible to your whole network, or even beyond that. Docker containers are great since you can create them within minutes, and they would be setup and ready to go, so if you mess up your database you can always recreate it in a heartbeat. You can recreate the standard database, or a custom database using a .bak file. Docker gives you true sandbox experience where you don’t need to worry about services each time you need a new database to play with. There are some drawbacks, but the advantages outweigh them.
To use all its advantages you first need to install Docker. Depending on where you want to install it (Windows 10 or Windows server) you need to approach it differently. For Windows server, there are just a few commands to achieve it, for Windows 10 – you need to sign up on official Docker web page and download install, but before that, you need to setup your computer.
Setting up Docker on your computer
Make sure that your computer supports Virtualization technology. Turn on virtualization technology in your bios and when your computer boots up, turn Hyper-V feature on.
- How to install Docker on Windows 10? – Sign up and download Docker install https://www.docker.com/. Follow installation instructions. Make sure that Docker is set up to run Windows containers.
- How to install Docker on Windows server? – Open PowerShell as administrator and type in command: Install-Module DockerMsftProvier –Force and then second command: Install-Package Docker –ProviderName DockerMsftProvider –Force.
Next, I would really recommend you to use NavContainerHelper, it goes for both, Windows and Windows server users. NavContainerHelper is a set of scripts designed to help you set up and manages Business Central Docker containers. To install it enable scripts on your machine.
To enable scripts, in the PowerShell opened as administrator, type in the command: Set-Executionpolicy RemoteSigned.
Moving on, type in the command: Install-Module NavContainerHelper –Force to install NavContainerHelper and then use command: Get-Command –Module NavContainerHelper. To check if it installed correctly use the command: Write-
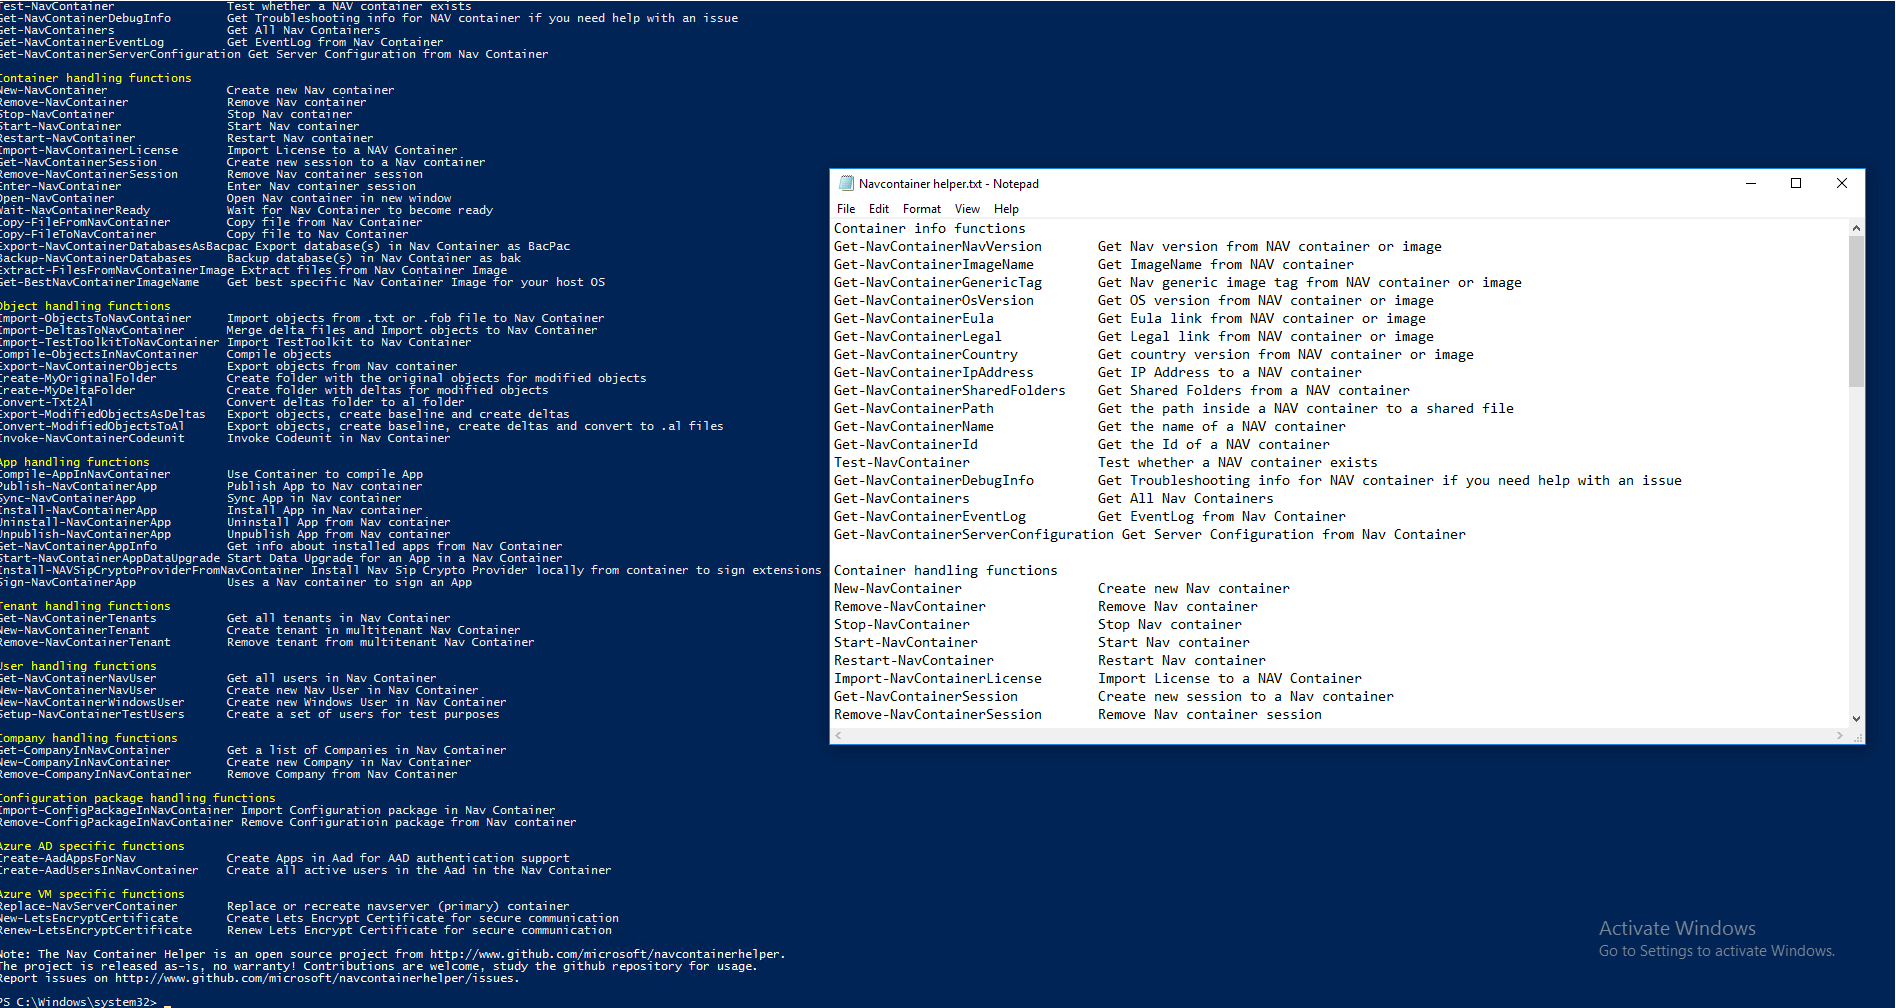
I would also recommend creating a template for New-NavContainer command so that you won’t have to go online and check all the possible parameters for that command.

Changing root directory for Docker
Before you run and start creating new containers, you might want to change the drive where Docker keeps its images and containers (it will save space on your Windows drive). To change the location, you need to go to Docker configuration file and add command. To access it you first need to change options of your file explorer to see hidden folders, then go to: “C:ProgramDataDockerconfig“, find “Daemon.json” file in this directory. If this file does not exist – create it. Either way, you need to add a command to it: “data-root”: “D:\docker“. If it’s a brand new file, then its content should look exactly like this:
{“data-root”: “D:\docker”}
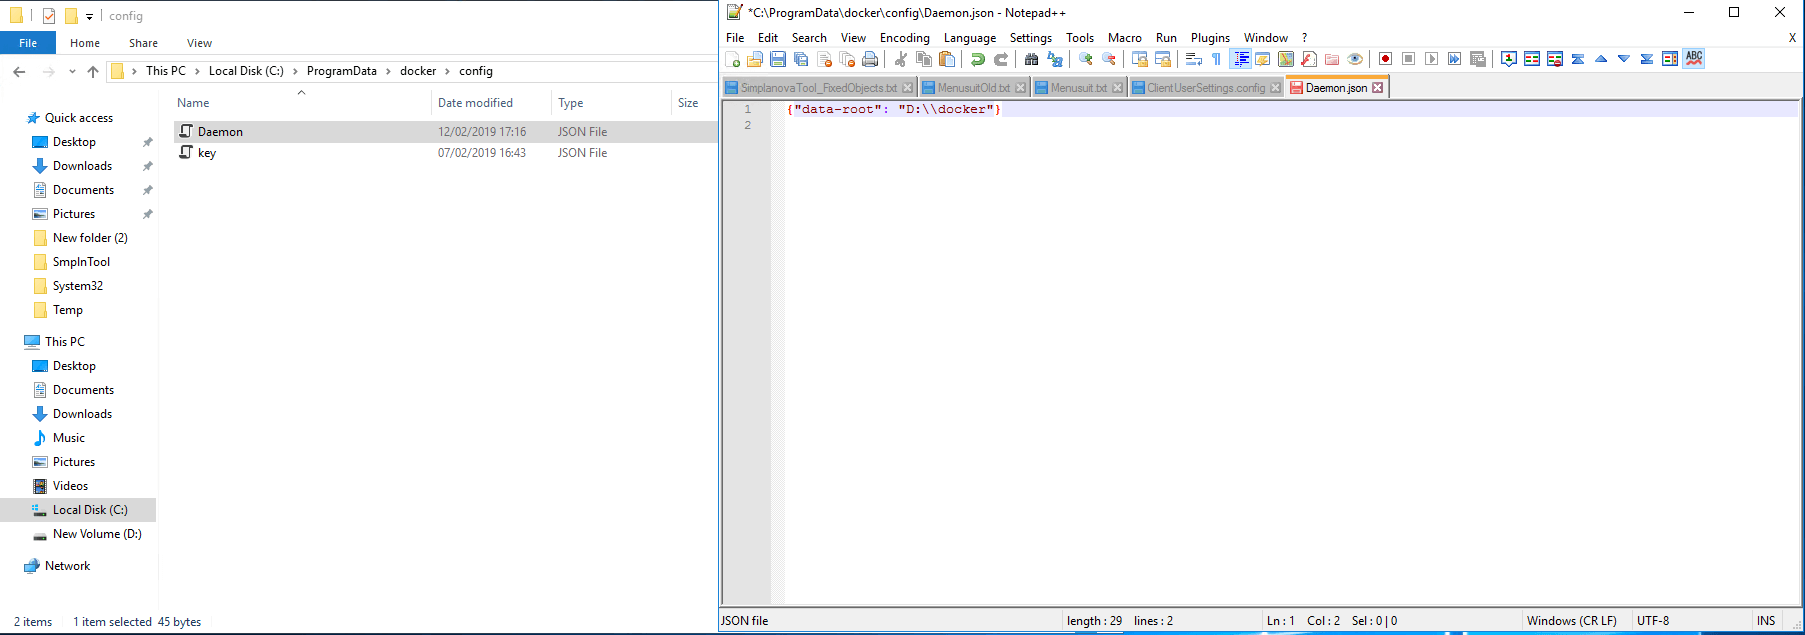
After saving this file, you need to restart Docker service for changes to take the effect. To make sure that your storage drive has changed, in command prompt (CMD) type in “docker info” and look for “Docker root Dir: “.
Opening Docker container for a local network
If you need your teammates help during the upcoming project, the easiest way to open container for the local network is to publish container ports. You might not be able to access the database from any other than host computer, but your teammates will be able to download database symbols and will be able to publish extension to this database. There is a better way to fully open containers on the local network by creating a transparent network for Docker. You can learn more about it during Simplanova training courses.
To publish ports of container firstly you need to know which ports are used by NAV. Then add an additional parameter when creating a new container. This additional parameter might look something like this:
-additionalParameters @(“–publish 8180:8080”, “–publish 81:80”,”–publish 7146-7149:7046-7049”,”–env publicFileSharePort=8080”,”–publish 444:443”)
Now, let’s analyze this parameter a bit. All additional parameters, when using NavContainerHelper commands usually are commands from base Docker, meaning that it directly controls container without touching NAV itself. There are exceptions, for example, when creating a database from a .bak file. Talking about ports, the port on the left is a port on your host machine, meaning, it has to be free otherwise you will get an error while creating a container. Each time you create a container with published ports, you need to choose free ports. The port on the right points to ports inside the container, meaning they will always be the same, each time creating new NAV container they will stay the same.
Managing the container file system
One quick thing to note, you can always open Docker container database server using Microsoft SQL server management tool, but this tool will only see the file system of the container itself, instead of host machines. So if you want, for example, restore database or maybe create database .bak file and store it for safekeeping, you might want to know how to access container’s file system and how to extract files from it. Both of these actions are easy. To access containers file system you can either use one of the shortcuts created on your desktop or use one of a few commands provided by NavContainerHelper or Docker itself.
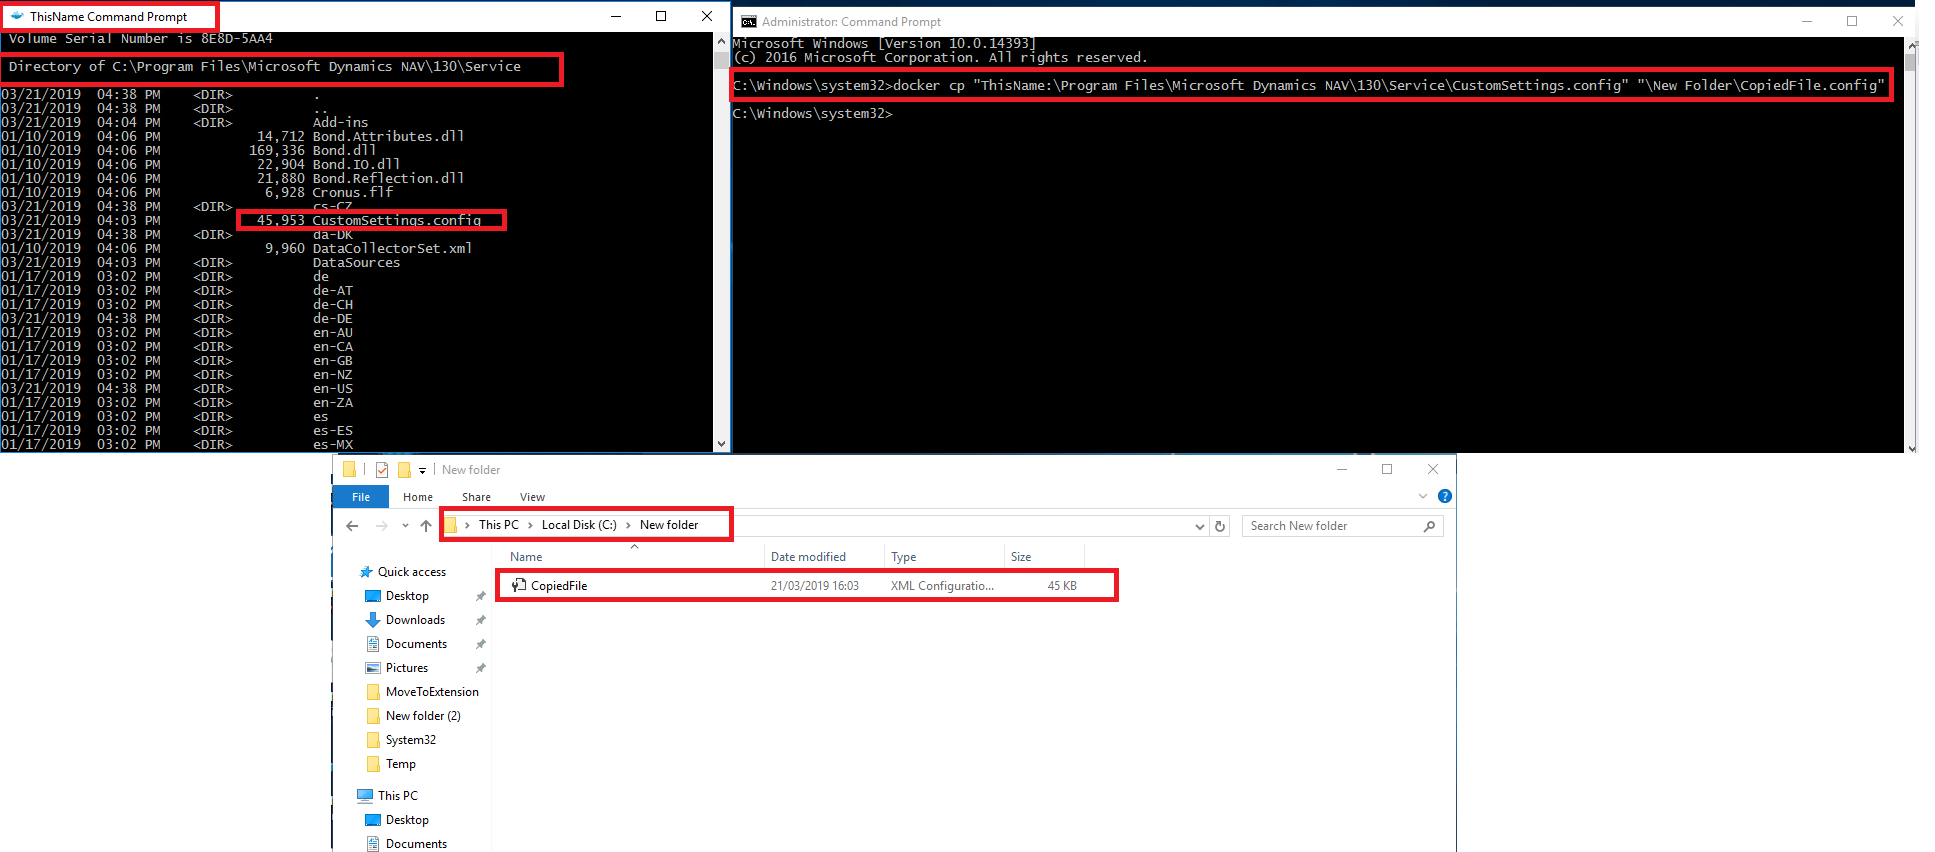
Extracting files from the container is another story. The easiest way is to use command “docker cp”, this command allows you to move files in and out of the container, take a note that you can always extract files from the container, but when you want to put something in, you first need to stop it. The syntax for copying files from the container to host machine is:
docker cp <container name>:<path to file directory>/file.txt /<path where you want file to appear on your local machine>.
If you want to insert file to container use the same command backward:
docker cp <path to file on host machine> <container name>:<path to location in container where you want file to appear>.
You can change the name of the file during the copying process by adding to destination path a new file name and type or example: “<destination path>/NewName.Txt”. If there exists a file with the same name in the destination on the container, it will be automatically overwritten.
I hope this information will make the whole process a lot easier while using Docker. If you are interested in perfecting your skills in Extensions, please find more information about Dynamics 365 Business Central Extensions Training here.