TXT2AL tool
Now that Microsoft decided not to include C/Side with Business Central knowing how to develop in AL language and how to quickly transfer your solution from C/AL to AL is crucial. In this article, we will talk about how to use Microsoft’s TXT2AL tool to convert your C/Side solution to AL language. Also, if you are interested in how to develop in AL language in general, you can check out Simplanova’s Extensions Training.
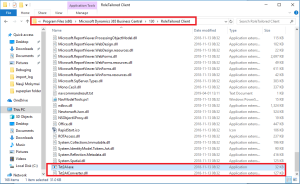
TXT2AL tool is created by Microsoft specifically to transfer C/Side solutions to AL language, and luckily for us, it’s a quite straight forward tool which works reasonably well. It is included in Role Tailored Client by default, so after installing Business Central, you can find this file in Role Tailored Client folder.
You can either use TXT2AL tool with CMD, or Power Shell, but before that, there is some preparation to be done. Let’s go through the whole process quickly and then analyze everything in more detail.
In this article we will:
- export modified and not modified objects in .txt format;
- extract deltas;
- use TXT2AL tool to make the conversion;
- upload result to VSCode.
Before starting, you will need:
- Business Central installed on your device (TXT2AL tool is installed with Business Central);
- default database;
- custom database upgraded to the version of the default database;
- VSCode.
How to export modified and not modified objects with TXT2AL tool
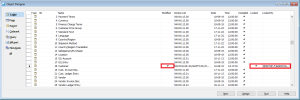
There are different ways to approach modified and not modified objects exportation. One way is to export the whole database, but the export process, delta extraction, and the conversion process require a lot of time. The more logical way is to extract files that you need on the custom database only. It’s easy to do, just put on the filter that takes modified objects only. However, for default database, you need to somehow select objects that you need only. The way to do it is to lock objects that you want to export.
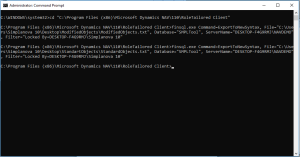
Now that objects which you need are locked, you can use this as a filter in export command. So the command for default database should look like this:
finsql.exe Command=ExportToNewSyntax, File=“<Location you want file to appear><filename>.txt”, Database=“<database where your objects reside>”, ServerName=“<server name where your database resides>”, Filter=“Locked By=Computer”.
After applying this filter, only objects that were locked by your computer will be exported.
And the command for custom database might look like this :
finsql.exe Command=ExportToNewSyntax, File=“<Location you want file to appear><filename>.txt”, Database=“<database where your objects reside>”, ServerName=“<server name where your database resides>”, Filter=“Modified = Yes”.
Another option is to lock modified files manually, and use that or any other filter that you can think of as well.
Enter this command to CMD (Command Prompt) window, open it as an administrator, and navigate to a finsql.exe file location. By default, it should be: “C:Program Files (x86)Microsoft Dynamics 365 Business Central130RoleTailored Client”.
All exported objects will be in one .txt file.
The reason why you need to use this CMD command is because of “ExportToNewSyntax” flag; without it, the conversion might have unexpected errors. If you try to export files from C/Side, those files won’t have the flag.
Extract deltas
The reason why you need to have a default and custom database is that you need to have deltas for the standard objects. Exported objects have everything (including default code) in them, and TXT2AL tool will either convert it (but then you will have to spend hours trying to delete the standard code), or most of the converted file will be filled with information that some functionality is not supported. Even if it completely converts without any problem, you won’t be able to publish this application, since that object already exists in the database. When you extract deltas, only the modifications will be converted to AL as an object extension.
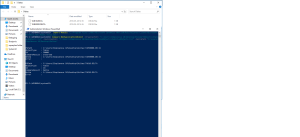
To extract deltas, open Power Shell as an administrator and enter the command.
Compare-NAVApplicationObject -OriginalPath “<path to standard objects>/<filename>.txt” -ModifiedPath “<path to custom objects>/<filename>.txt” -DeltaPath “<path where you want your deltas to appear>” -ExportToNewSyntax.
For the standard files, the extension will be created in .txt format, and the full custom object will be untouched.
Use TXT2AL tool to make the conversion
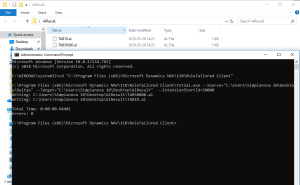
Now that you have deltas, you can proceed to the conversion itself. To do the conversion, you can either use CMD or PowerShell, just remember to open them as an administrator. If you are using CMD, navigate file location where the txt2al.exe file is located. Then enter the command:
“txt2al.exe –Source=“<path to deltas FOLDER>” –Target=“<path to FOLDER that you want your all files to appear>” –ExtensionStartId=50000”.
Up until now, you had to indicate individual files, but when doing conversion itself, it is important to indicate folders only.
If you are using PowerShell, the command is almost identical, you just don’t need “.exe” next to “txt2al”:
“Txt2al –Source=“<path to deltas FOLDER>” –Target=“<path to FOLDER that you want your all files to appear>” ExtensionStartId=50000”.
ExtensionStartId tells the converter to renumber all objects, starting at the number that you indicate, and for every object, it increases by 1.
Upload results to VSCode
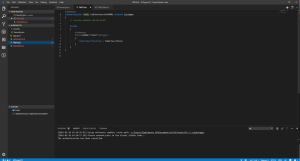
After this command executes, you will have just as many files as you had objects in the beginning. This command won’t create AL project, so just copy all .al files and paste them to the existing AL project.
Now you have your solution converted to AL language.
