The Objects Import Worksheet is a built-in Microsoft Dynamics NAV 2013 Development environment form that is used during binary import of objects. All Dynamics NAV Developers Consultants face this form on a day-to-day basis, to import, export various objects from and into various databases. We are pretty sure that everyone knows all available object actions of Import Worksheet, but not everyone knows how to use all of them. In this blog article Simplanova wants to show technical NAV people how to use Dynamics NAV 2013 and Dynamics NAV 2009 Import Worksheets action DELETE (Image 1) during objects’ import.
How to delete objects from import worksheet in Microsoft Dynamics NAV 2013
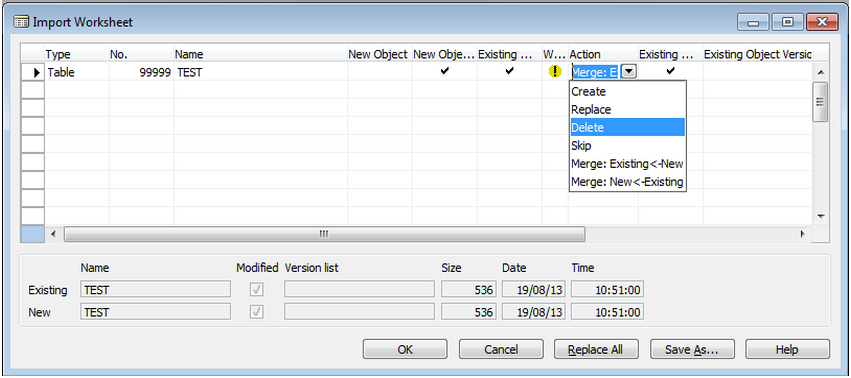
Image 1. Objects Import Worksheet
It may sound strange, but it is impossible to select Delete action manually. You will get the following error (Image 2):
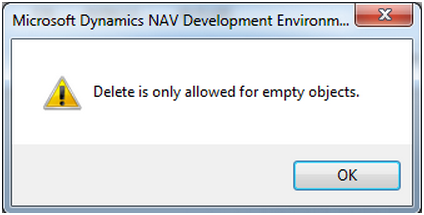
Image 2. Worksheet
So what does it mean “empty objects”?
An empty object is an object which has an Object table entry (2000000001) but has no binary information stored, or in other words field “Blob Reference” is empty. To achieve such object state there is one simple method: to create a new object table entry through the object designer.
Simplanova would like to introduce a short guide on how to create a deletable empty object.
1. Make sure that your licence allows modifying the deletable object.
2. Remove your real object from your database.
3. Create a new object table entry:
3.1 Choose (in the object designer) object type same as the removed object in step 2.
3.2 Navigate to the very bottom of the object designer, placing the cursor on an empty line (Please see Image 3).
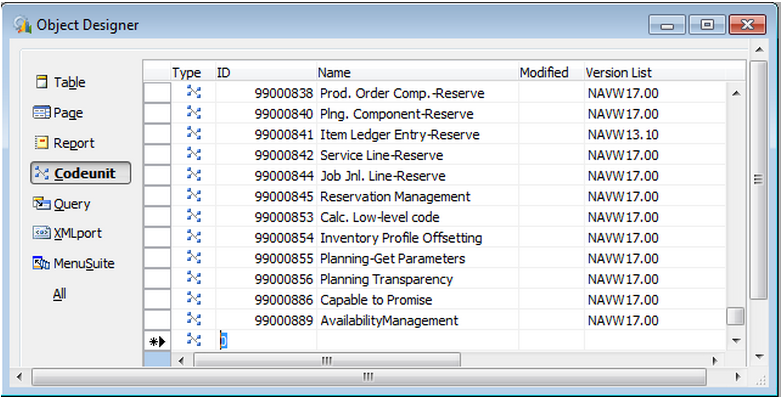
Image 3. Object Designer Empty line
3.3 Fill the ID field with the exact ID of the object which was deleted in step 2. Also fill other information which is required for the Object (Name, Version List, Date and etc.).
4. The last step is .fob file export.
5. Test it, try to import the .fob file back to the database.
NOTES: DELETE action will be suggested only if the object with the same object type and object ID exists in the database. Otherwise import worksheet will suggest action “skip”.
When deletable object is of table type, you have to make sure that this table does not contain any data in any companies, otherwise the following error will appear:
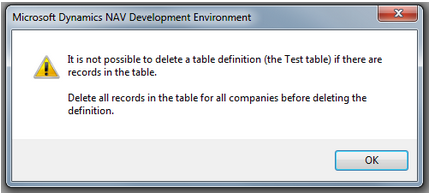
Image 4. Table import error
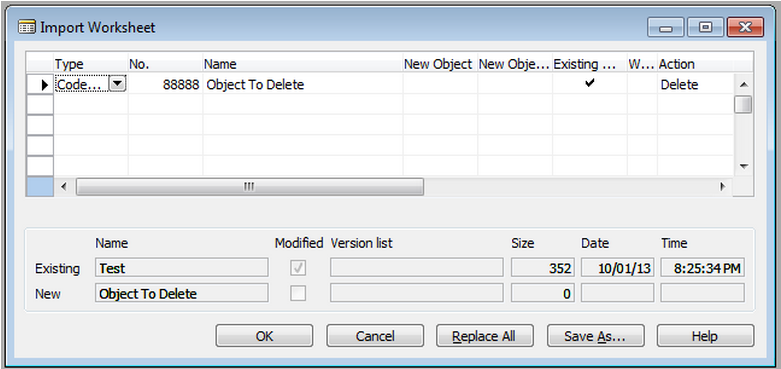
Image 5. Import of empty object
Now this .fob file can be easily distributed between your multiple customers or solutions.
Why and when it should be useful to know how to delete objects from Import Worksheet for Dynamics NAV Developers and Consultants?
Simplanova uses this functionality very frequently to exclude out-dated objects from custom solutions during the Dynamics NAV upgrade process.
You can also use this functionality to remove renumbered objects from the customer databases.