Guidelines for Partners
Microsoft Dynamics Business Central (Dynamics BC) is a powerful enterprise resource planning (ERP) solution that streamlines business processes, manages financials, and aids in decision-making. To ensure that Dynamics BC functions works seamlessly and efficiently, thorough testing of its APIs (Application Programming Interfaces) is crucial. Postman, a popular API testing tool, can greatly simplify the process of testing and interacting with Dynamics BC’s APIs.
Postman provides a user-friendly and intuitive interface that allows developers, testers, and administrators to send HTTP requests to Dynamics BC APIs, inspect responses, and validate the behavior of these APIs. Whether you’re developing custom extensions, integrating external systems, or troubleshooting issues within Dynamics BC, Postman can be an invaluable asset.
In this guide, we will explore how to leverage Postman to test Dynamics BC requests effectively.
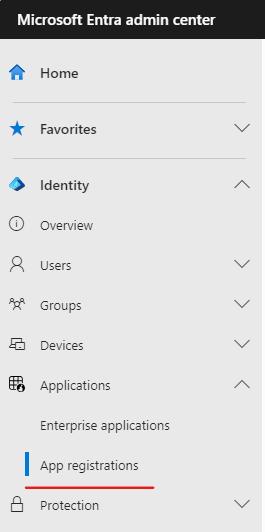
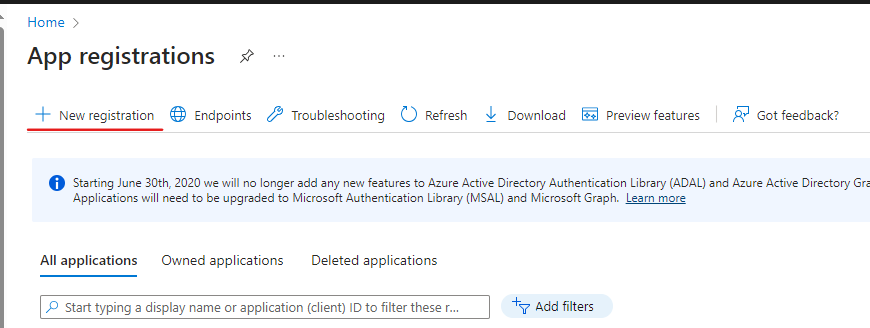
To begin utilizing the Business Central API functionalities, start by opening your web browser and go to the Microsoft Entra ID center to create an Azure App Registration. Sign in with your credentials (the same credentials you use for accessing Business Central). Once signed in, select Microsoft Entra ID in the left menu. Select the App registrations menu item in the center menu and select New registration.
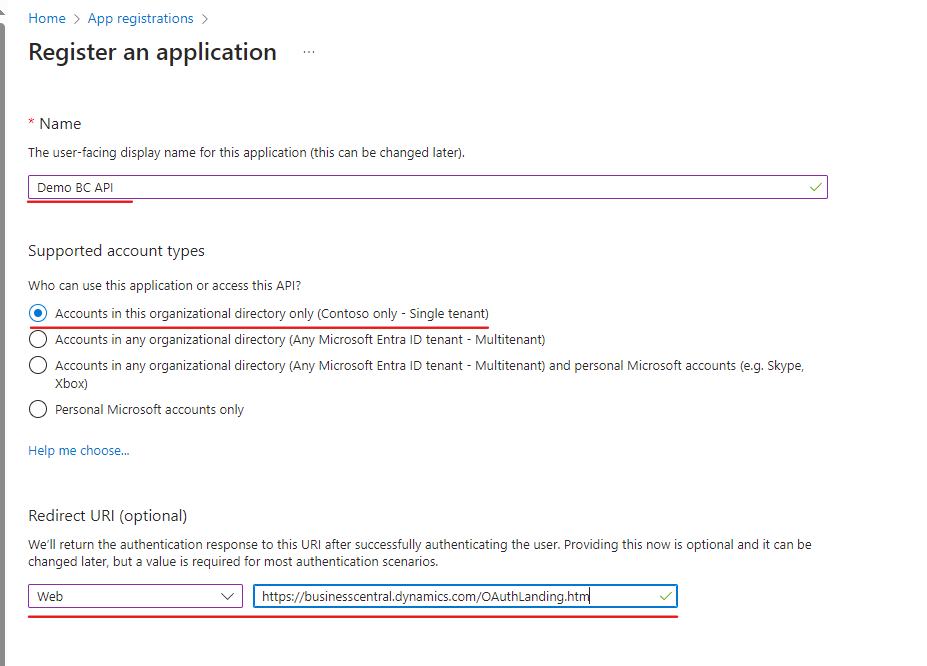
Provide a name for your application. You may use ‘Demo BC API’ as the application name. Ensure that the radio button for ‘Accounts in this organizational directory only’ (Single Tenant – [CompanyName] only) is selected. In the ‘Platform’ dropdown, choose ‘Web,’ and then add ‘https://businesscentral.dynamics.com/OAuthLanding.htm’ as the Redirect URI. Finally, click ‘Register’ to finalize the registration.
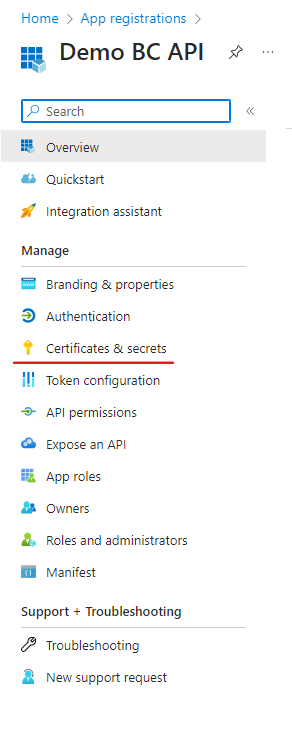
Navigate to ‘Certificates & secrets’ in the central menu. Click on the ‘New client secret’ button, and provide a description along with an expiry date (maximum 24 months). Finally, click ‘Add’ to finish the process.
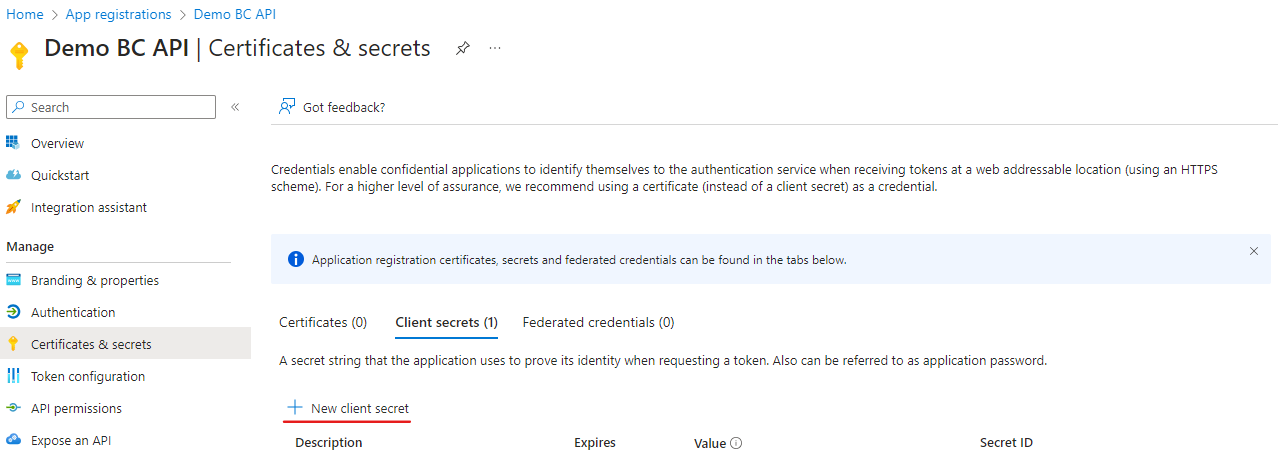
Copy the Value of the client secret and store it for later use (f.e. copy to a notepad).

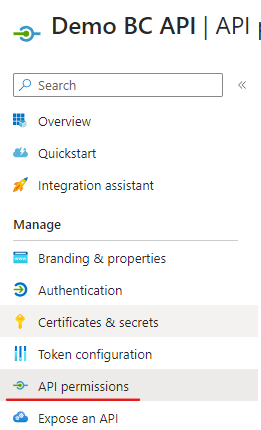
Select API permissions and select the Add a permission button.

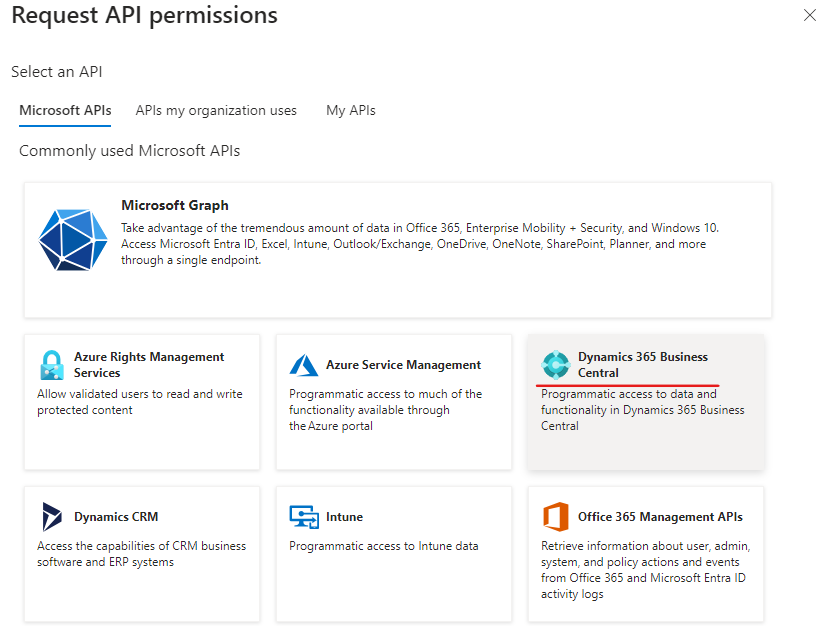
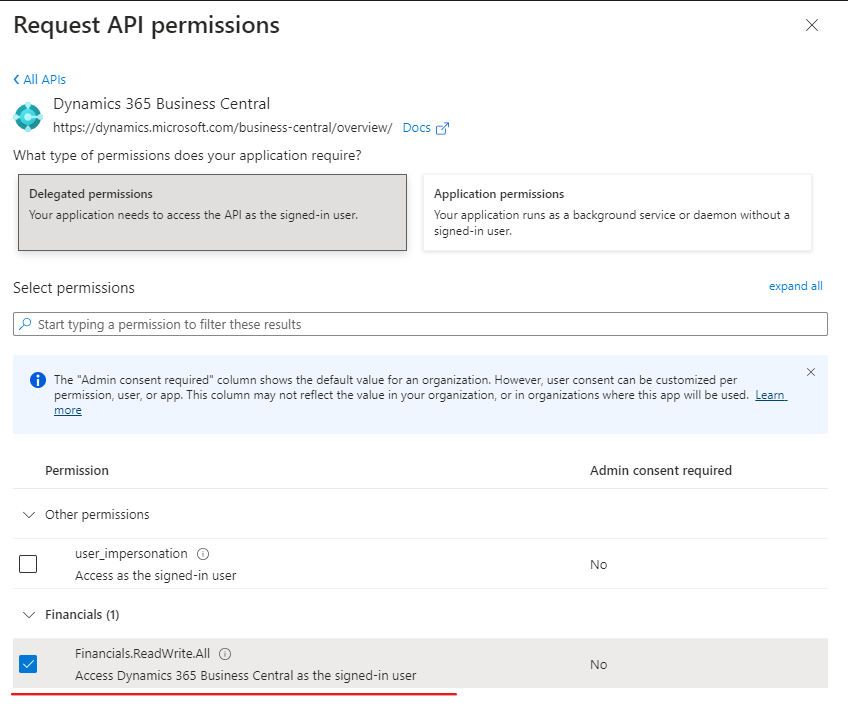
Select Dynamics 365 Business Central from the list, and then select Delegated Permissions.

As you can observe, you have the flexibility to add various API permissions to suit your specific use case. However, for our current scenario, we will select ‘Financials.ReadWrite.All’ and proceed by clicking the ‘Add permissions’ button.
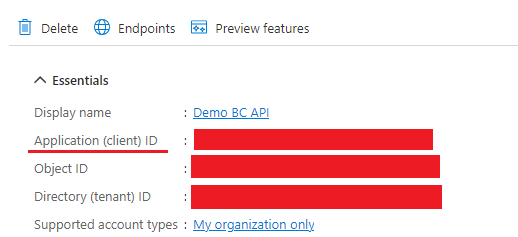
The last step is to gather all the values you need to create your OAuth2 call. Select Overview from the menu, and copy the Application (client) ID.

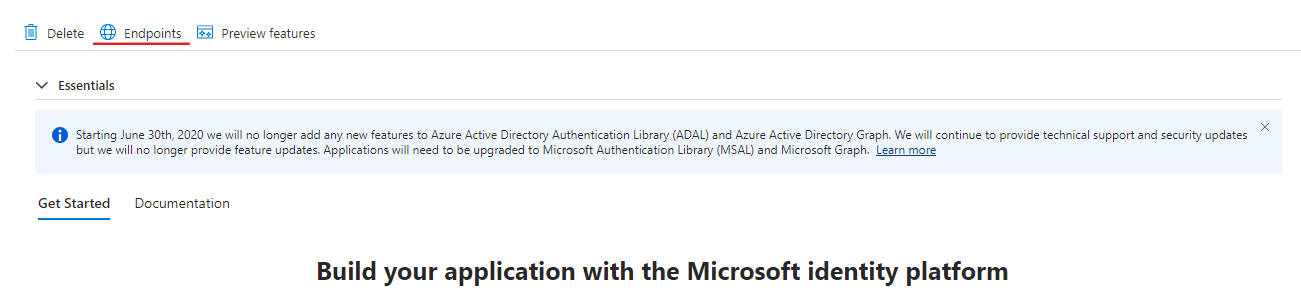
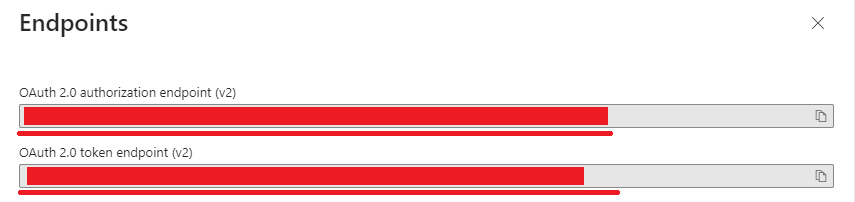
Select the Endpoints button and copy the first two endpoints (OAuth 2.0 authorization endpoint (v2) / OAuth 2.0 token endpoint (v2)).
At this stage, you should have all the necessary information to configure authentication. If you haven’t already installed Postman, please download and install it for your respective operating system. Now open it change the Authorization to OAuth 2.0.
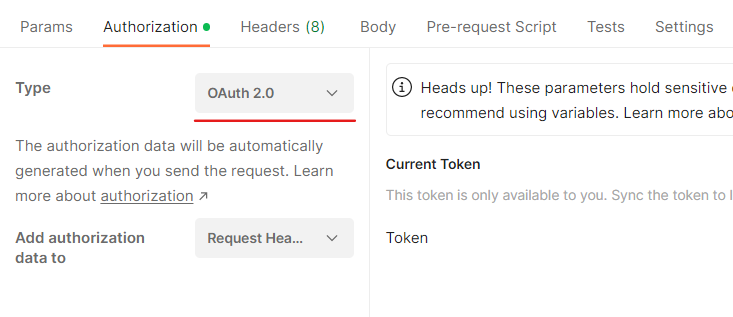
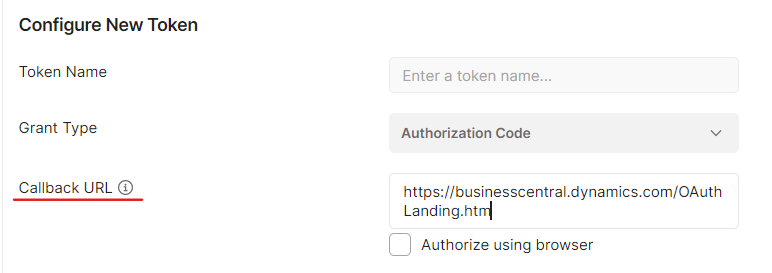
In the Configure New Token section, make sure the Grant Type is set to Authorization Code. Use https://businesscentral.dynamics.com/OAuthLanding.htm as the Callback URL value.
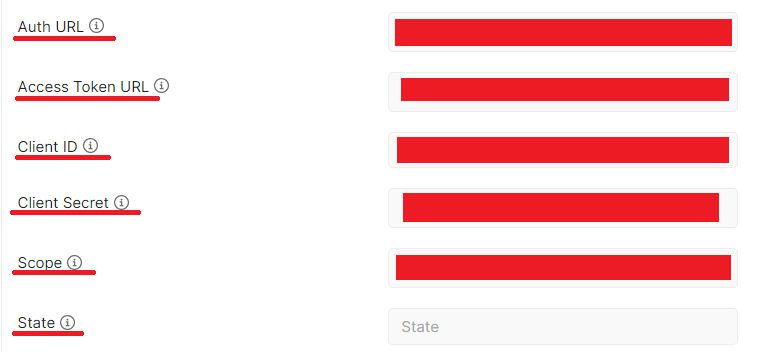
Enter the copied Authorization Endpoint in the ‘Auth URL’ field and the Token Endpoint in the ‘Access Token URL’ field. Provide your copied Client ID and Client Secret in the designated fields, and set the scope to ‘https://api.businesscentral.dynamics.com/Financials.ReadWrite.All.
Select the “Get New Access Token” button in Postman. This will prompt you to sign in with your organizational account. The first time you’ll also need to grant permissions to the app. Then “Manage Access Tokens” windows should open and “Use Token” button needs to be pressed. If you receive an error message indicating an issue with your credentials, it may be necessary to generate a new token. This can occur when you initially create the token for a single session, and it subsequently requires updating.

At this point, if everything went correctly we have access to our business central environment API’S.
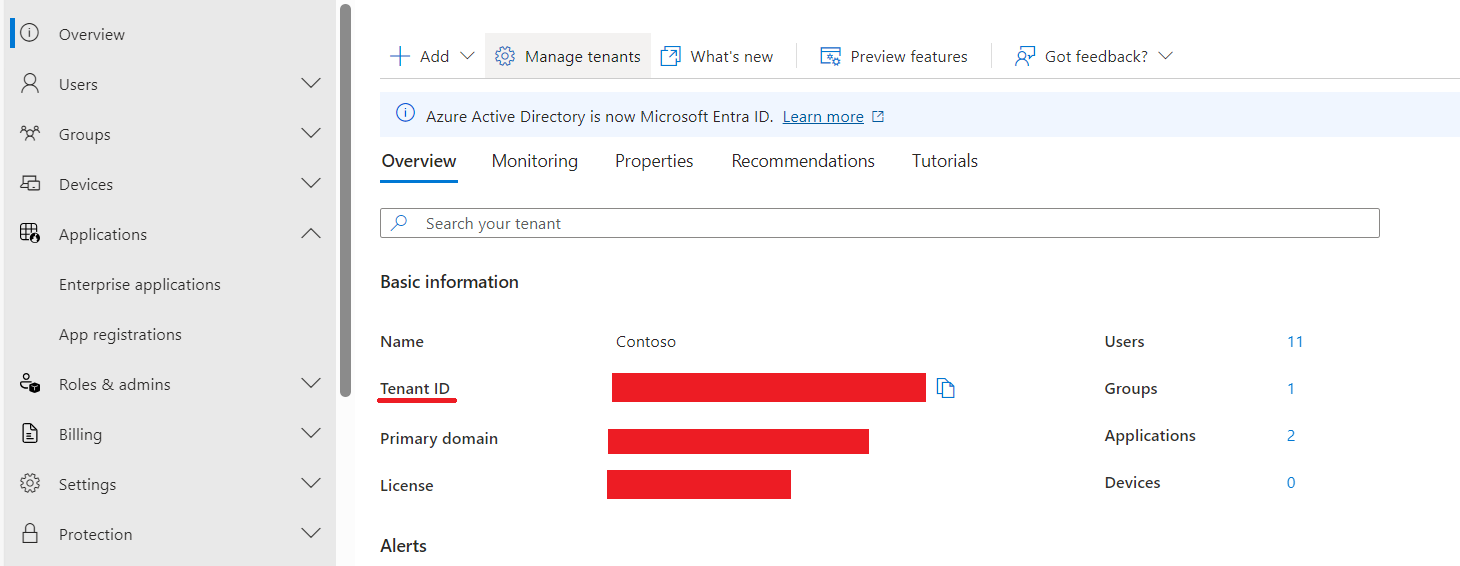
The main aspect of using HTTP requests is crafting the necessary URLs. Business Central has its own URL base, which looks like this: https://api.businesscentral.dynamics.com/v2.0/<tenant>/<environment>. To initiate the desired request, you first need to know your tenant ID. You can find your tenant ID in your Microsoft Entra admin center.
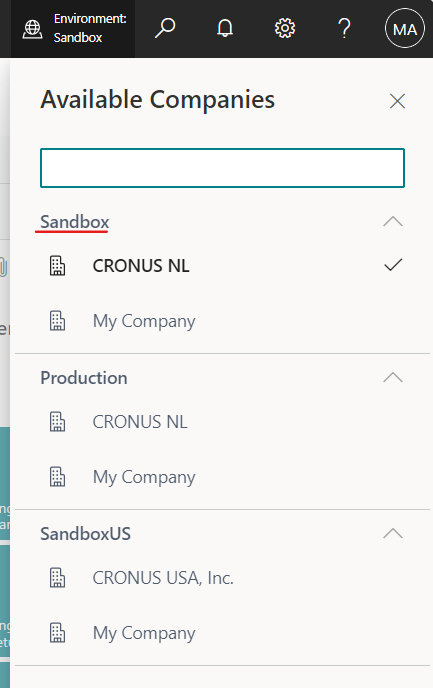
To find your environment name, open Business Central and look for it in the top right corner of the toolbar:
Now, insert your Tenant ID and Environment Name into URL and use it in a GET request to get all available Business Central APIs. If you have only one tenant, specifying it in your URL is not mandatory.
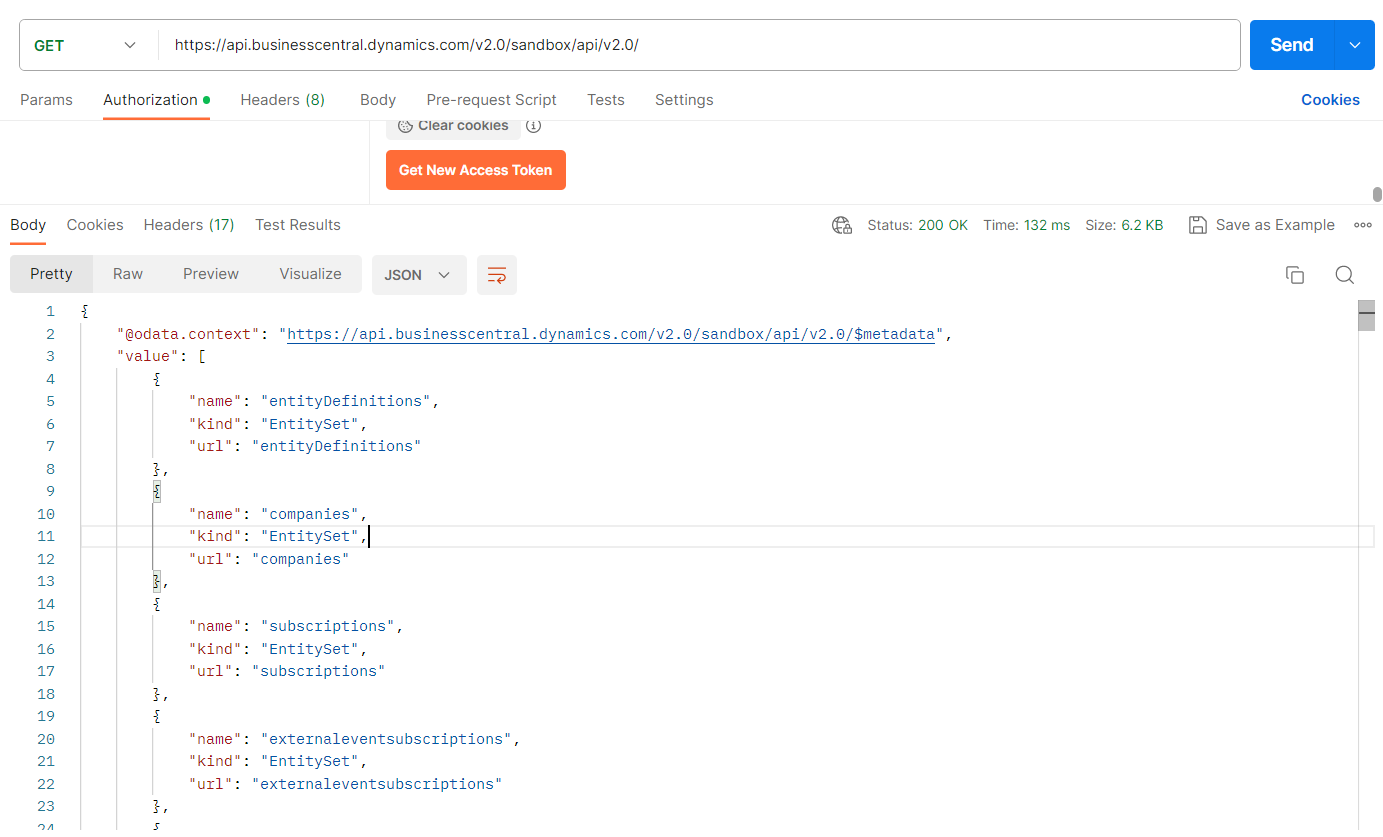
As of October 13, 2023 (BC23), there are a total of 77 standard APIs. Please note that API calls are case-sensitive, so exercise caution in this regard. As you may be aware, data in Business Central is stored within individual companies through a structured database system. Therefore, most API calls should include a reference to the specific company whose data you intend to access. For example we can access companies data and choose which company data we want to take.
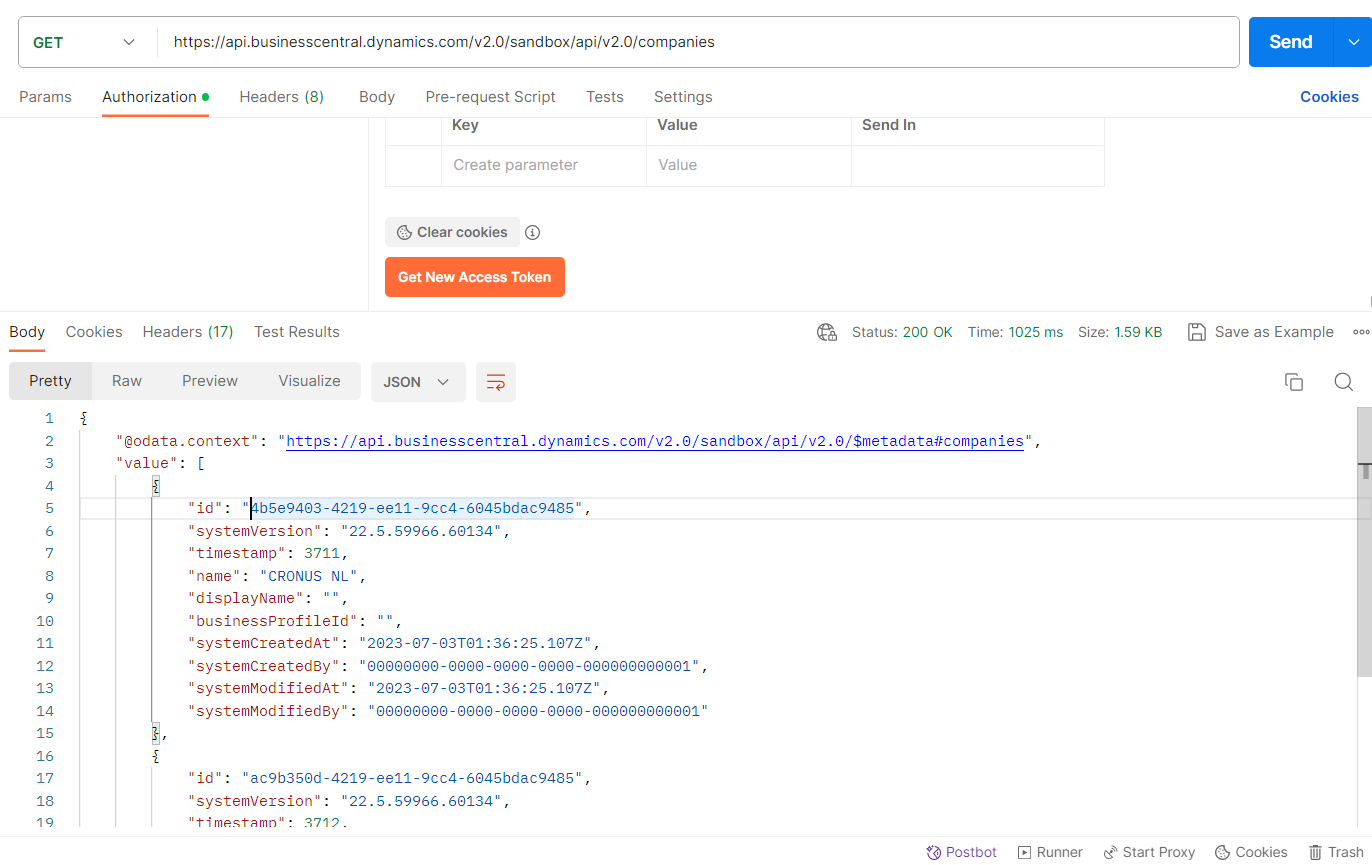
Use desired company id in GET request. In this example we are getting all items in CRONUS NL company.

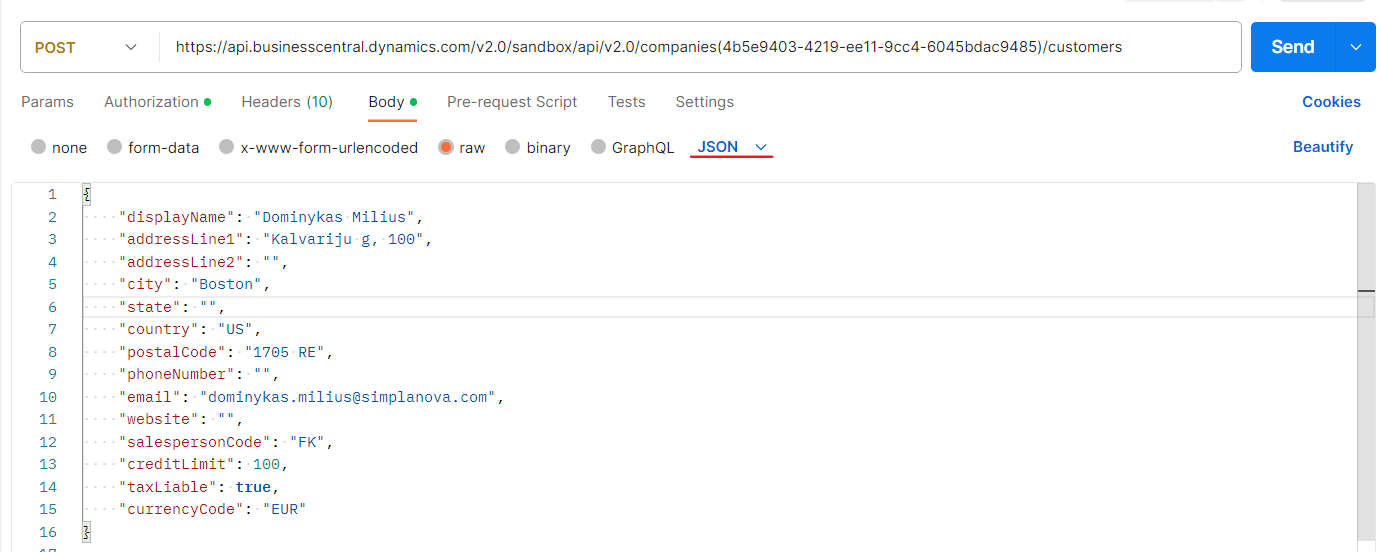
To create a new record in the Customers table within Business Central using the POST method, you need to populate the JSON body with the necessary information for insertion. You can copy the body structure after making a GET request and then proceed to fill in the required fields.
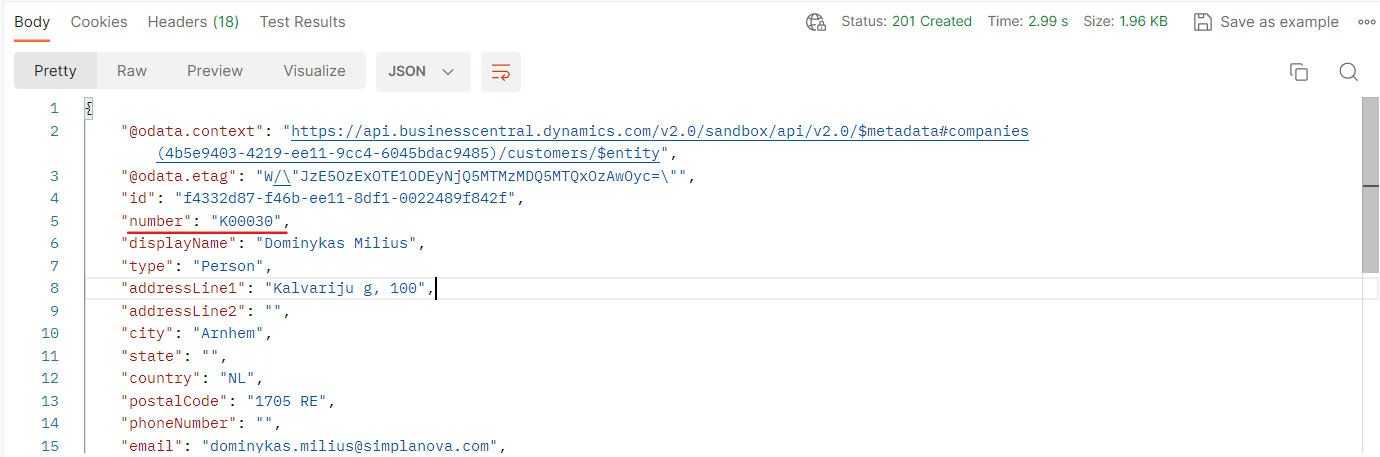
After successfully initializing POST request it returns created record.
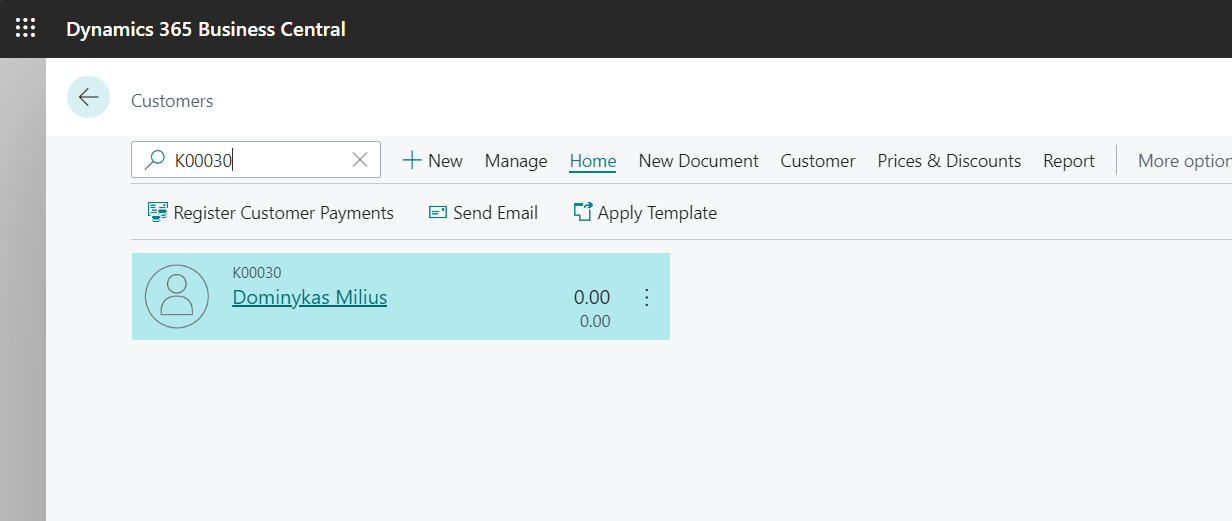
Now let’s open Business Central and check if record is visible there:
In Business Central, to remove specific records, you would use a DELETE request. When using a DELETE request, ensure that the URL specifies the endpoint for the specific record ID.
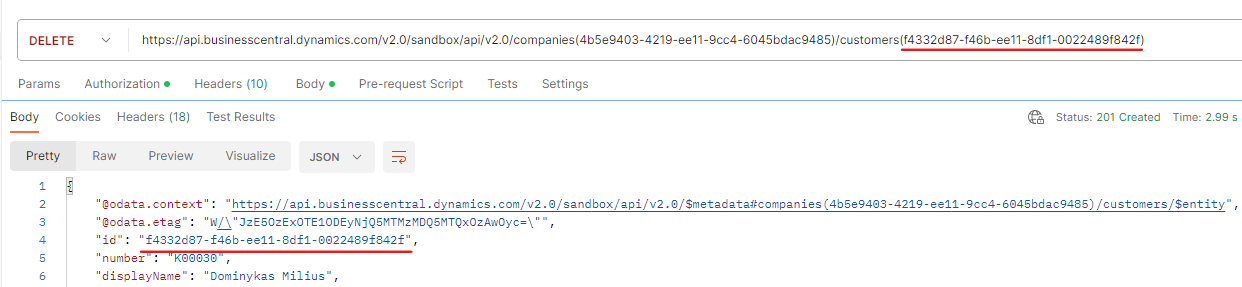
After sending a DELETE request, the response should typically include a status code (204 No Content) indicating the success of the operation.
Conclusion
In this guide, we have explored how to test Dynamics BC requests with Postman. We begin with Azure App Registration and permission setup, proceed to OAuth2 configuration, and utilize Postman for authentication. While this blog covers the fundamentals, it’s worth noting that these requests offer a wide range of possibilities. We trust that you’ve gained the essential knowledge to delve deeper into this subject, including the basics of accessing Dynamics BC APIs using the provided URL structure, as well as creating, verifying, and deleting records.