Guidelines for Partners
As you probably have noticed, the SMTP module was replaced by “Email – SMTP Connector” and “Email – SMTP API” apps in the Business Central 20 version and will cause an error if you use the standard SMTP module. So, in this article, I will present possible SMTP mailing usages and how you can rework the old functionality.
Main differences in usage
First, you must install “Email – SMTP Connector” and “Email – SMTP API” apps in your solution. Then fill in Mail Subject, Sender, and Receiver Emails, and create a text body. The difference between the previously used procedure AppendBody and the new functionality is that you have to store an email body in a text variable, e. g.:
Instead of:
AppendBody(‘Hello everyone’)
AppendBody(‘<p>First paragraph</p>’)
Use this:
Body += ‘Hello everyone’;
Body += ‘<p>First paragraph</p>’
Sending an email using “SMTP Message” codeunit
When everything is prepared, we can use a codeunit “SMTP Message” to store all information about the email. Use equivalent procedures: AddFrom, SetToRecipients, SetSubject, SetBody, AddAttachment. Once we fill all required information, we have to connect to the SMTP server using codeunits “SMTP Client” and “SMTP Authentication” and their procedures: SetServer(EmailServerName) (e.g. ‘smtp.gmail.com’), SetBasicAuthInfo(EmailName, EmailPassword), Connect(EmailServerName, Port, SecureConnection), Send, Disconnect.
Some explanations about SMTP servers – the server to use when using office365 (e. g.: @outlook.com) mail is smtp.office365.com and smtp.gmail.com when using Gmail. In general, port 587 is almost always the recommended one. Also, when using SMTP, Secure Connection must be set to true. The following picture represents the usage of the new SMTP applications and how to send a simple email message:
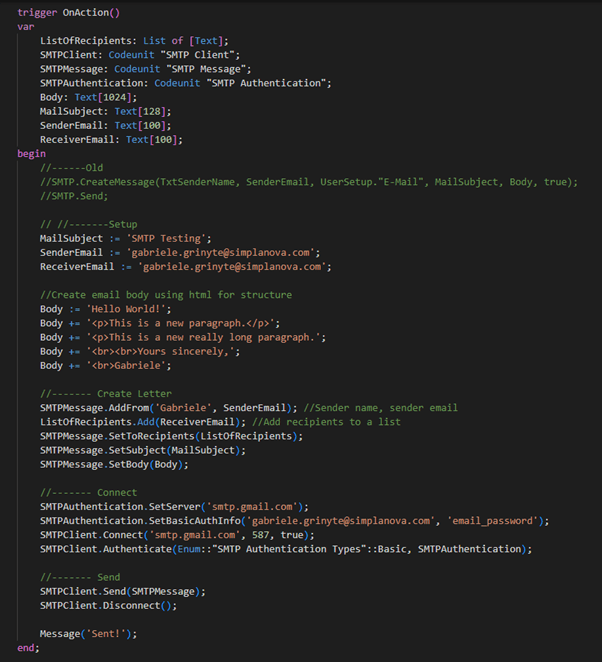
This approach is more suitable for customized SMTP usages, where you setup SMTP server details in custom added tables or fields since you can filter users with passwords, hardcode something, create users with code or so – it gives more flexibility.
Sending an email using “Email Accounts” standard module
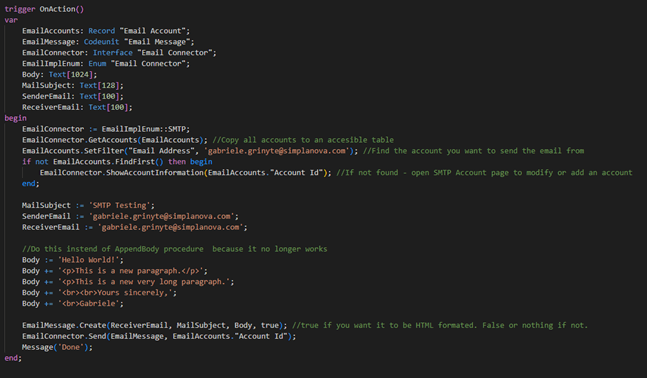
Another approach would be to use a standard module, “Email Accounts.” Using this module, you have to set up a new email account on Page “Email Accounts” and mark it as an SMTP account. For this, you will have to use an interface “Email Connector,” Record “Email Account,” Enum “Email Connector,” and Codeunit “Email Message.”
Firstly, for the “Email Connector” interface, you have to choose the SMTP option from the “Email Connector” enum, as shown in the example below. After that, you will have to get all email accounts copied to an accessible table in the system by using an interface procedure GetAccounts and filter the one from which the email will be sent.
Once we filter the SMTP email, we will have to fill in all required information about the email as we did with the first example – Subject, Sender, Receiver, Body, Attachments. After that, create a message using EmailMessage.Create(ReceiverEmail, MailSubject, Body, IsBodyHTMLFormatted) and send via the interface EmailConnector.Send(EmailMessage, EmailAccounts.” Account Id” – the ID of the filtered SMTP account). Here is an example of the standard “Email Accounts” module usage:
For this approach, you will have to set up an email account using the standard wizards, which use protected tables. This means you will not need to worry about the information leak because you cannot directly access those protected tables. Custom added tables can be exposed to someone if you accidentally make a mistake.
Adding attachments to an email
Let’s dig a little bit deeper. So what happens if we want to add an attachment to the email? Previously used procedures AddAttachment and AddAttachmentStream were replaced by the procedure AddAttachment in “Email Message” codeunit. There are two overload procedures for the AddAtachment – one takes attachment content converted to base 64, and the other takes InStream as a parameter. If we want to add an attachment using “SMTP Message” codeunit, we can only use the procedure AddAttachment that takes the InStream type variable as a parameter.
There are two ways to add an attachment:
1. The first one is to put any content in Base64Convert.ToBase64(‘’) procedure and use AddAttachment to add that content into the attachment. Or you can just read the content from a file and add it to the other that will be created as an attachment. Just use the procedure EmailMessage.AddAttachment(FileName, ContentType, ContentConvertedToBase64) as shown in the both examples below:

2. Another way of adding attachments is using the type InStream. Just upload something into the InStream variable and pass it as a parameter using “Email Message” or “SMTP Message” codeunits:
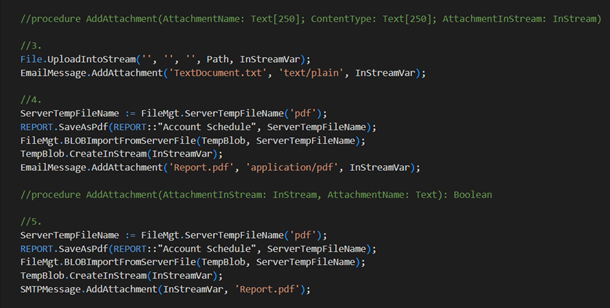
So, there are two ways of adding an attachment while creating an email. Do not forget that you cannot directly access local computer files in the BC20 version, so you will have to use online file storage or rework the server side if you have used the client side.
Short introduction to “Email Accounts” page
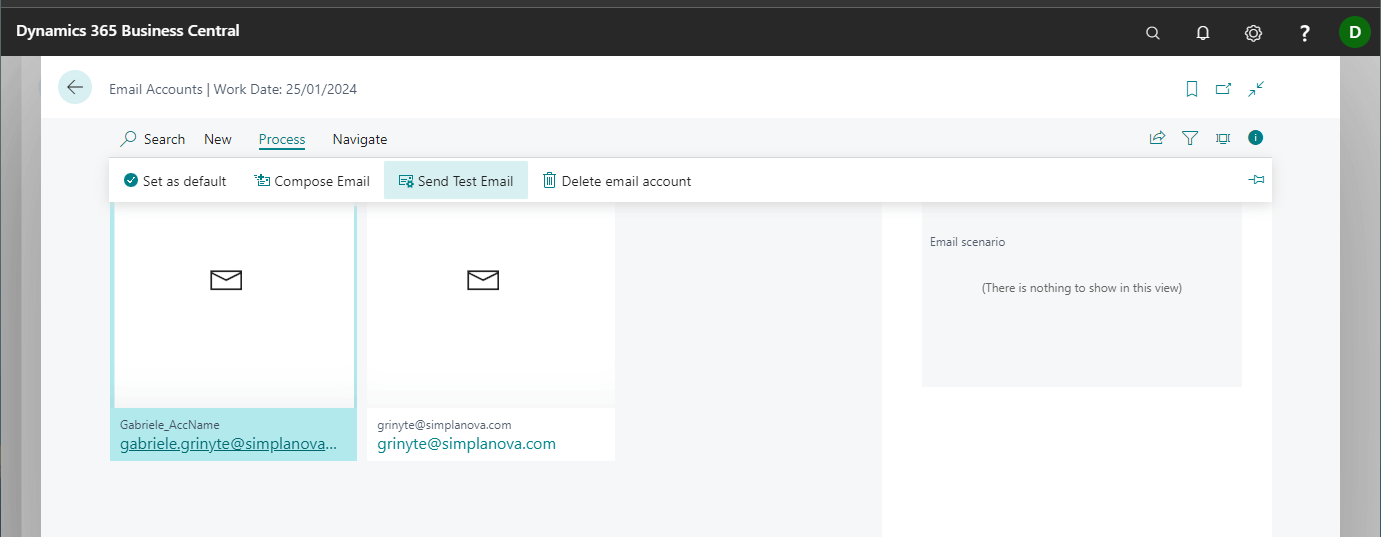
Since we have learned how to send a message via the code, let’s look at the web client and how to set up an email account. You can create, edit and delete your SMTP accounts from the “Email Accounts” page:
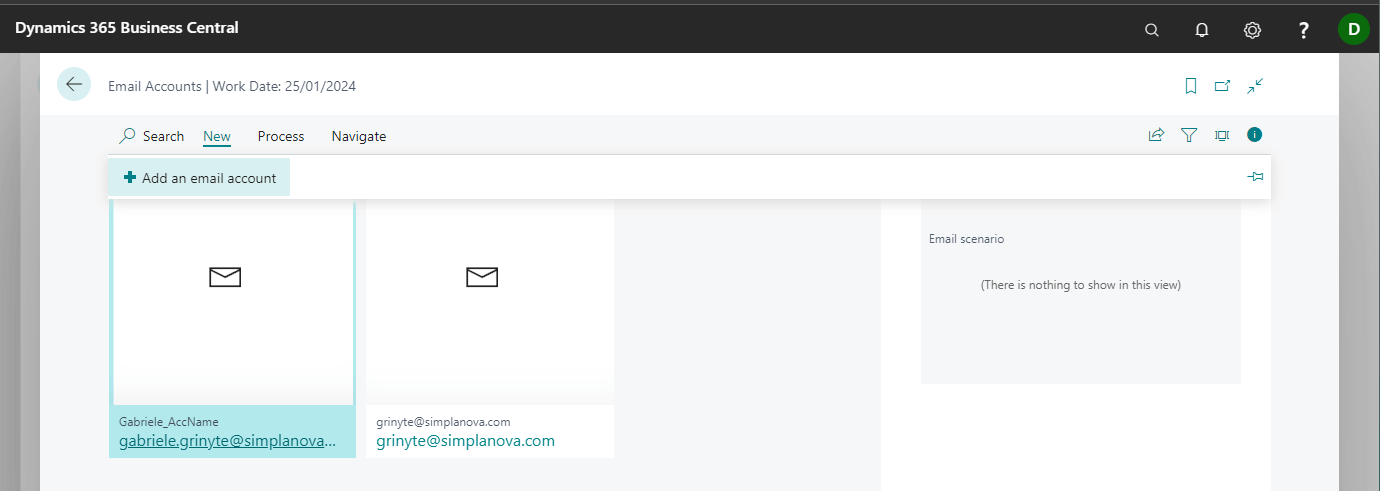
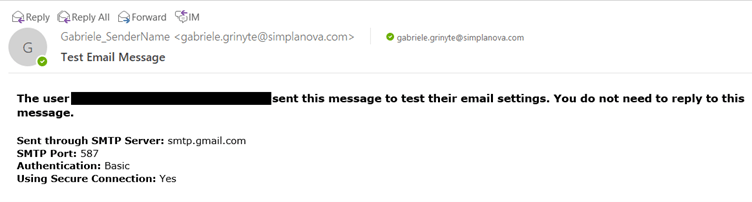
It is possible to test your account whether you have entered the valid information or not by sending a test Email:
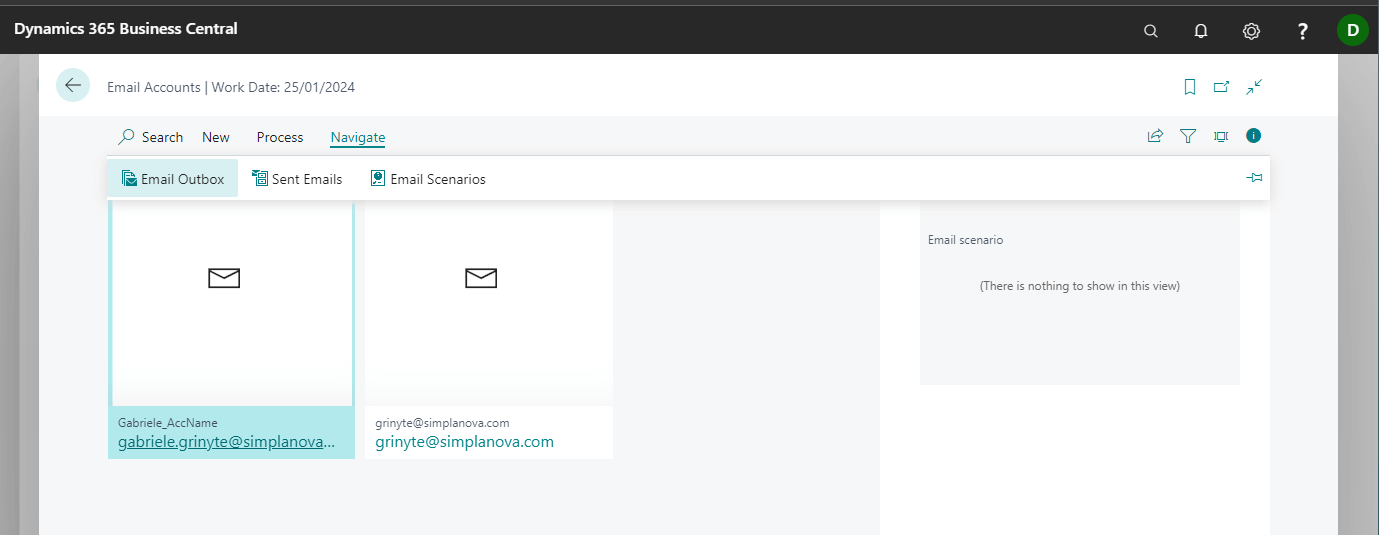
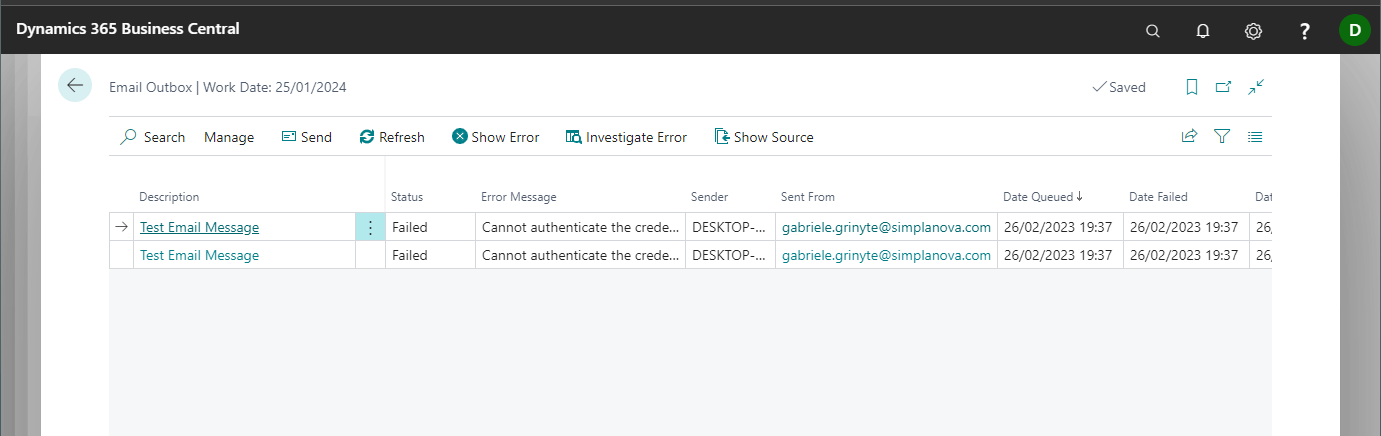
In case of an error, you can troubleshoot it in the Email Outbox. In the list, you can investigate the error, and the action will show you where the error has arisen in the code.
In conclusion, you can now send the SMTP email in at least two different ways – using the codeunit “SMTP Message” and the standard module “Email Accounts.” You need to install “Email – SMTP Connector” and “Email – SMTP API” apps in your solution.