Guidelines for Partners
The purpose of this article is to show the basic functionality of managing email account and sending emails using Email and Email Message codeunits for Dynamics 365 Business Central.
To take advantage of sending emails, you need to configure them. I will review specific settings that enable additional functionality, such as adding attachments and recipients in a letter.
Email usage requirements
In order to use the new functionality of email, it is necessary to have worked:
- Dynamics 365 Business Central
- Local email service or email service provider
- Codeunit 8901 Email
- Codeunit 8904 “Email Message”
Local email selection has its own advantages in that you can change email settings according to your needs and thus you can fully manage the service. In our case, we will use an email service provider with a Microsoft Outlook email account.
New codeunits will also be used to demonstrate the latest email use cases and usability.
Set up email by adding account
First of all, in order to test the email functionality, we need to create an email account and enter the data. We need to open the Business Central web client and by pressing the search icon, type “email account” to find the Email Accounts page.
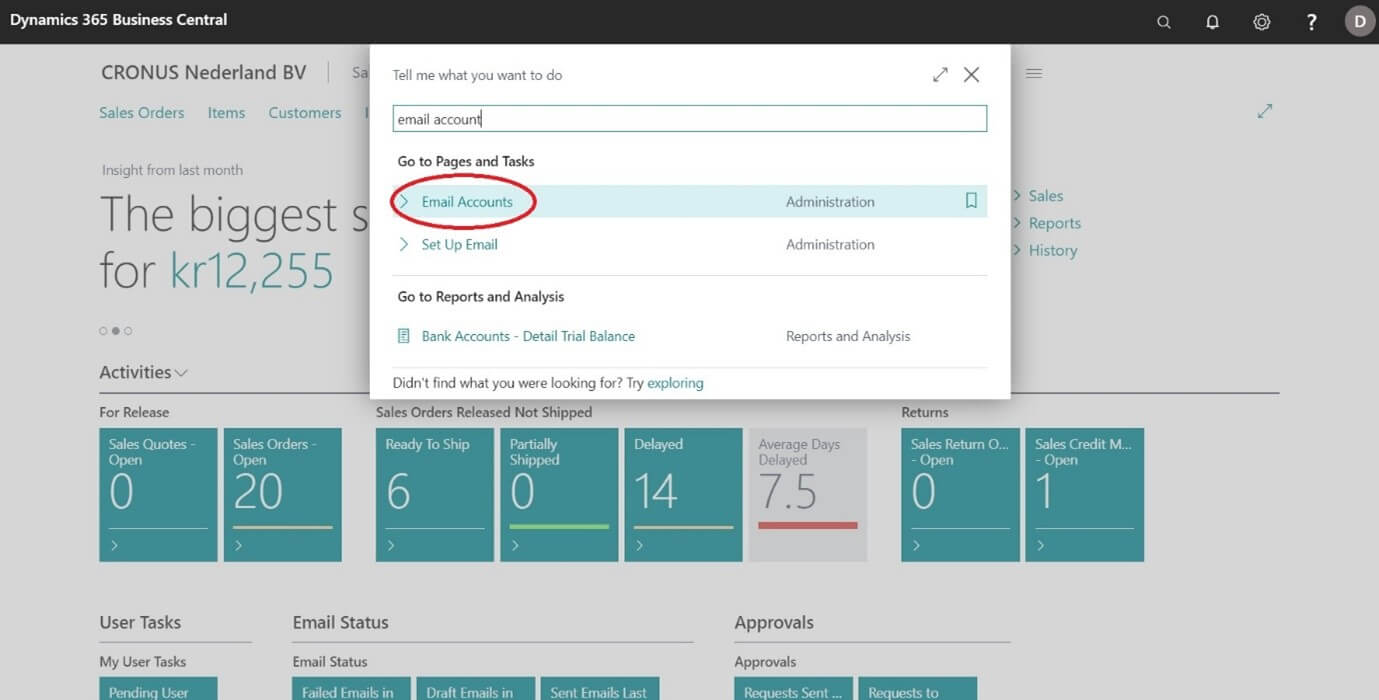
After pressing “Email Accounts” we will see a new window, which shows us several functions of what we can do with an email account. And features can only be used if you add a new email account.

When adding an email account, you need to select the extension that Business Central provides in the following table:
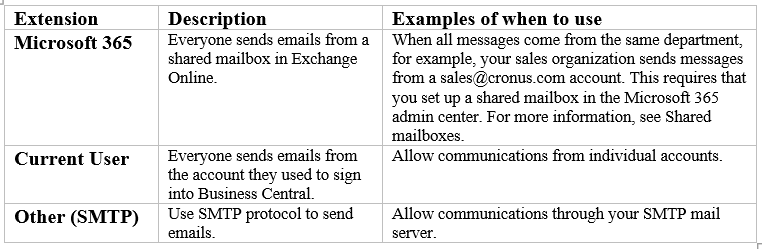
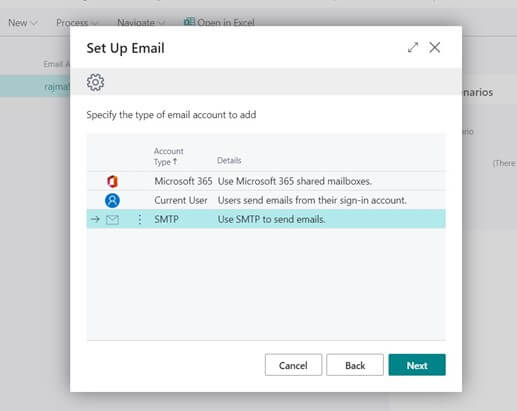
Thus, we have chosen SMTP (Simple Mail Transfer Protocol) to make it easier to send an email by specifying data from an existing email service provider. Using a Microsoft Outlook email service provider, we can register our personal emails and receive data from that service in order to enter that data into SMTP extension data fields.
Below picture shows the email account’s settings using SMTP extension:
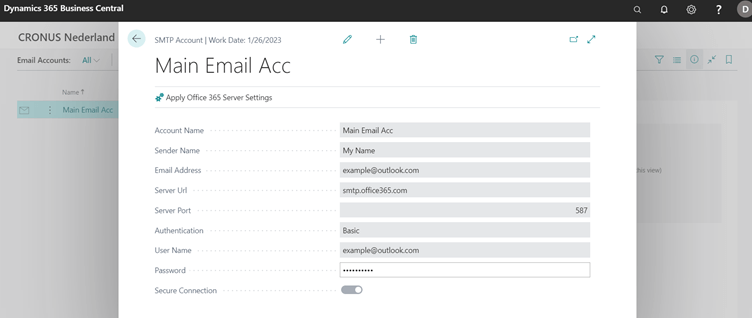
Thus, creating an email account allows you to send an email to other people like customers, colleagues, etc.
Creating test page with Email and Email Message codeunits
To use Email and Email Message, be sure to create an email account. In order to test the new functionality, we need to create appropriate files as examples that we can try.

These files could be in the main directory of the Business Central AL project. The first file “extable.pdf” is an example of PDF file type, we will use it to upload as an attachment in the email message. The second AL file “HelloWorld.al” is used as a page extension for testing Email and Email Message codeunits.
The following picture shows AL code with some comments below:
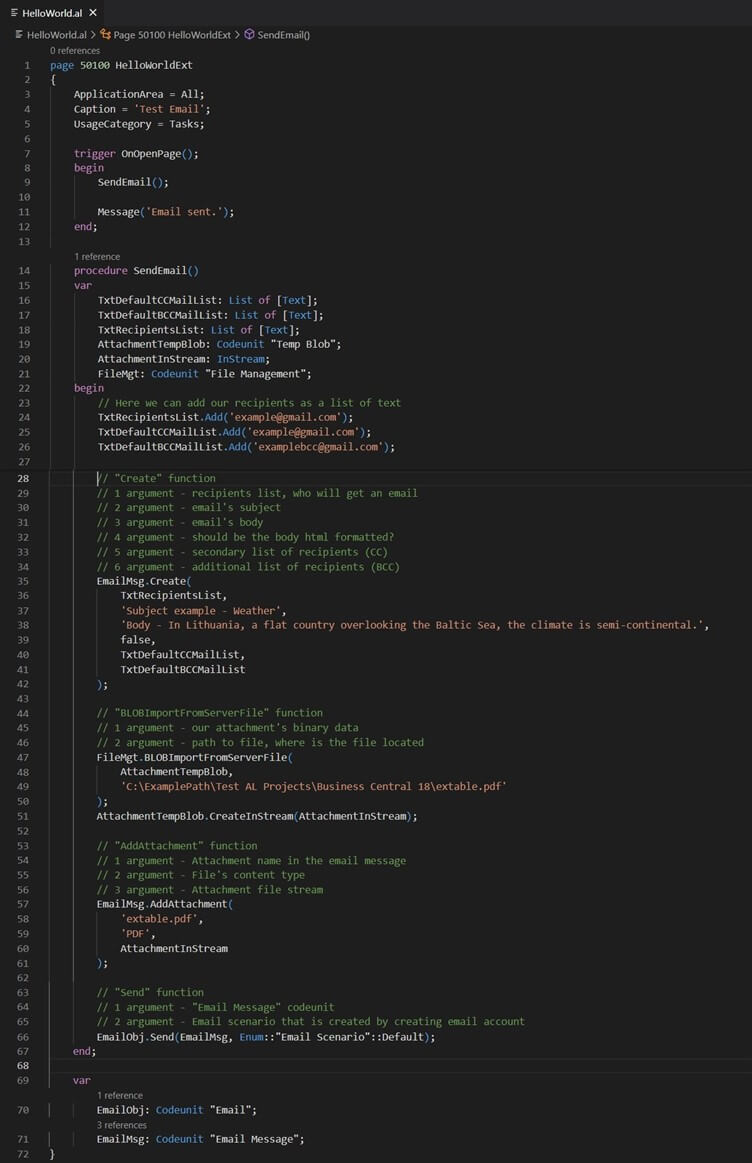
In this example, we are sending an email message with an attachment that is hosted/located locally.
Before sending an email message we need to add our recipients in a List of [Text] data type as shown in the “Create” function of the Email Message codeunit.
If we want to attach a file to the email message, we need to specify the file location in a local or hosted machine. It should be a full path to the file location, for example, “C:ExamplePathTest AL ProjectsBusiness Central 18extable.pdf”. Afterward, we can pass arguments to the “AddAttachment” function: the attachment name (not the file location), file content type, attachment file stream.
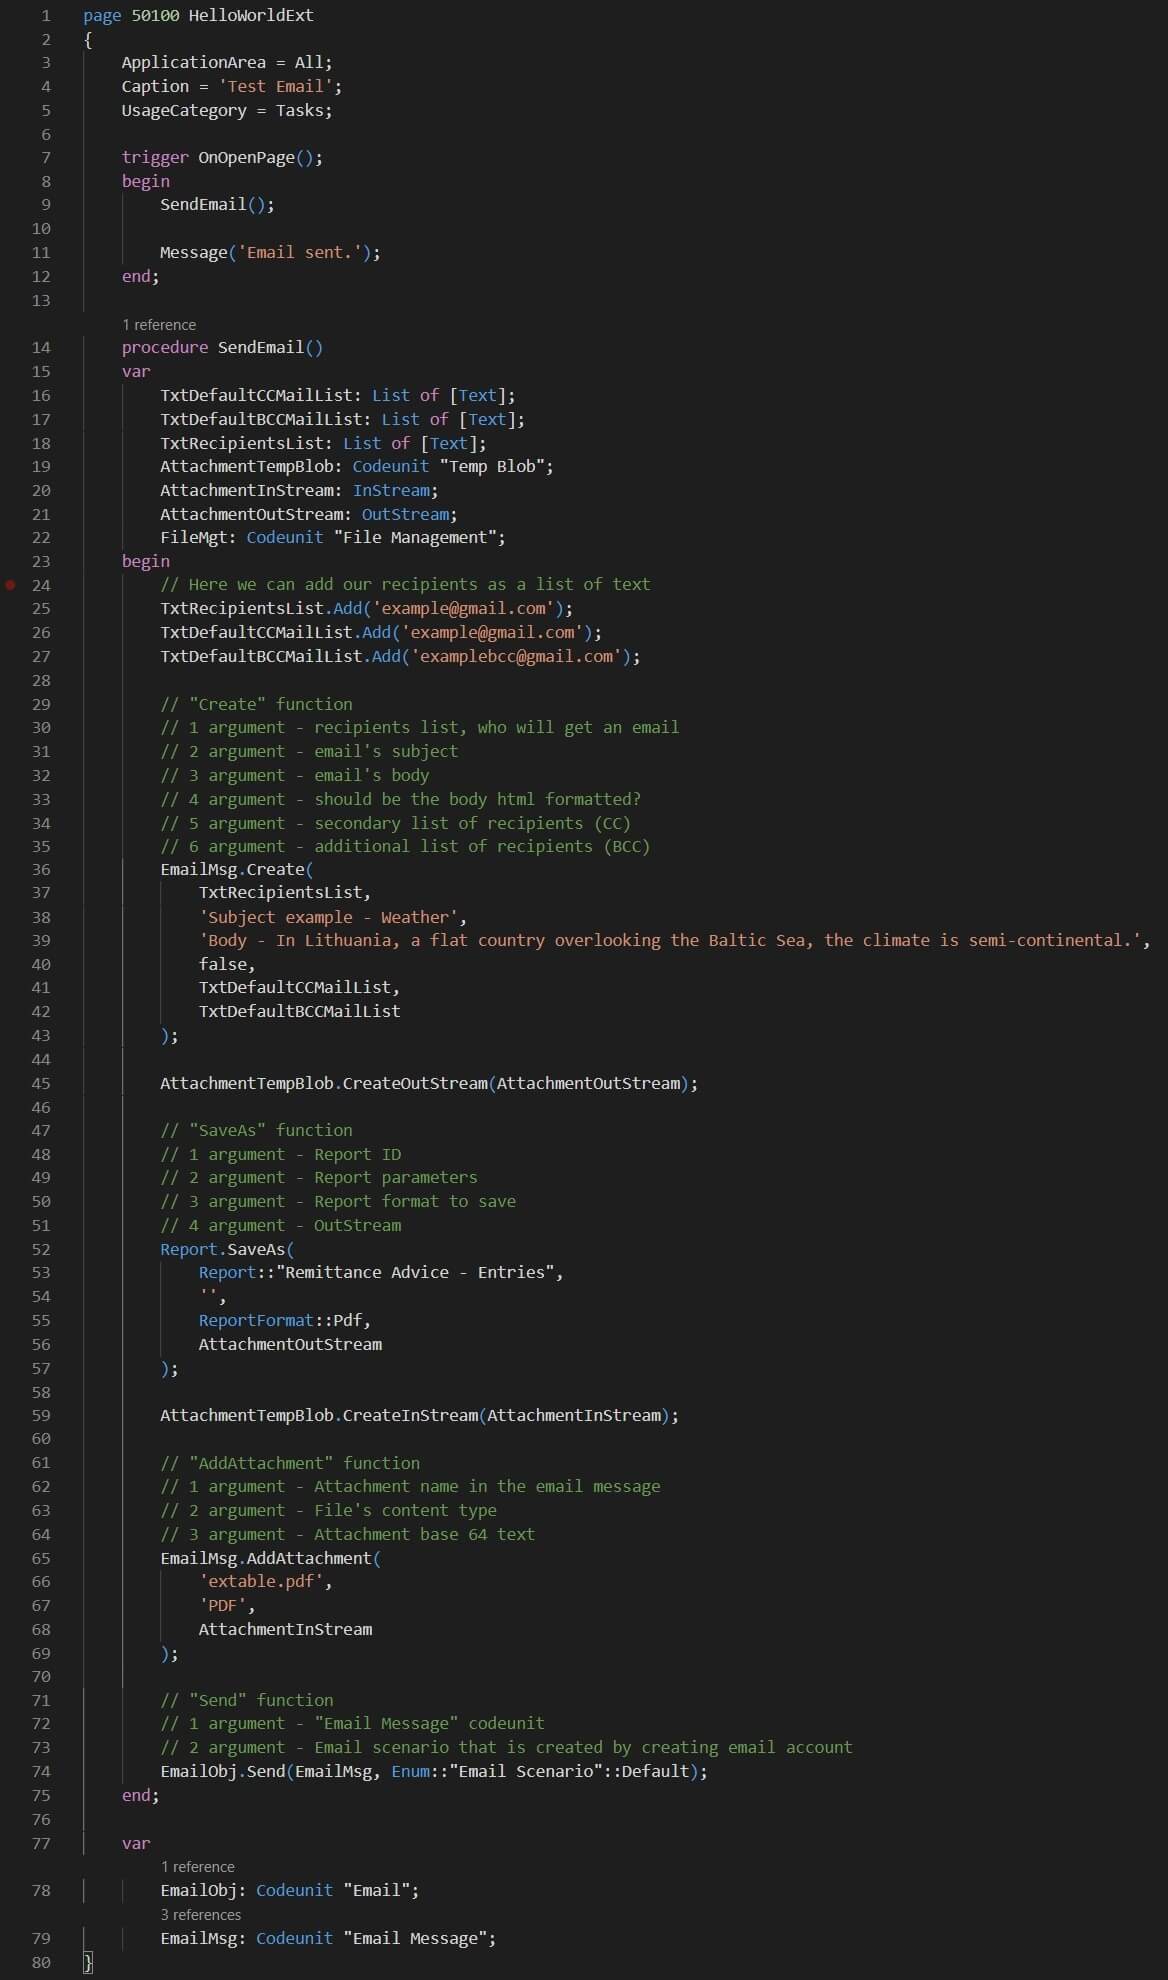
Send an email with a report attachment
Another example using Email and Email Message shows us how to attach the report to the email message by specifying Report ID, parameters, and a format. Instead of using the “BLOBImportFromServerFile” function, we are using the “Report.SaveAs” function:
The latest versions of Dynamics 365 Business Central have new codeunits as mentioned in the article, the previously used “SMTP Mail” codeunit will be removed in the future. The code must always be updated to avoid unpredictable cases.
If you want to know more about how to manage emails and where to find useful code, here are useful sources: