Anyone who has been using Business Central’s Windows Client might have had the opportunity to personalize their role centers or FactBoxes by defining new charts in the “Generic Charts” page and adding them to their desired areas. The current Web Client limitations have rendered the functionality to an almost obsolete state.
The purpose of this article is to introduce you to the basics of Business Chart Control Add-in in Dynamics 365 Business Central by creating an example chart using the AL code.
Necessary Components
Each unique chart in Dynamics 365 Business Central (aside from generic charts that can be displayed through the “Generic Chart” page) have their components that perform a certain role.
A basic chart is comprised of these components:
- Setup table (Ex. Table 760 “Trailing Sales Orders Setup”) – optional, but useful when wanting to make your charts more flexible.
- Setup page (Ex. Page 761 “Trailing Sales Orders Setup”) – optional, created if the chart is going to have a setup table.
- Management codeunit (Ex. Codeunit 760 “Trailing Sales Orders Mgt.”) – mandatory, used for data calculation.
- Chart page (Ex. Page 760 “Trailing Sales Orders Chart”) – the subpage, which displays the chart.
The previously mentioned components have been created in our extension’s source directory.
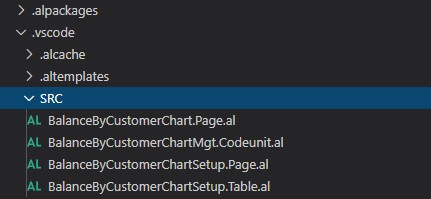
Now that we have defined the necessary components, we are going to have to code each one of them individually. For this example, we are going to create a chart using Business Chart Control Add-Ins, which displays every customer’s balance.
Creating Charts using Business Chart Control Add-In
To allow some room for flexibility in our chart, it is quite practical to create a setup table and page for the said chart. The most convenient way to access the setup would most likely be through the chart’s actions, but the action will have to be created later once everything else has been created.
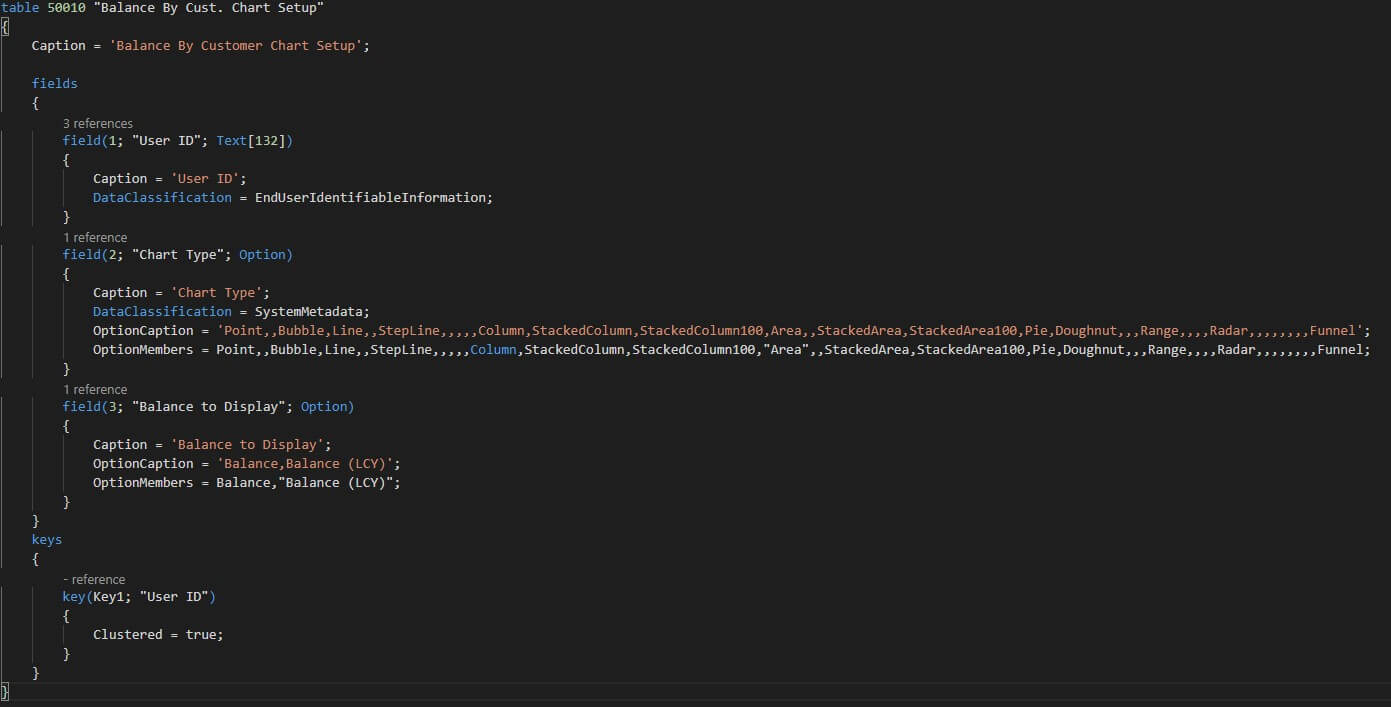
The setup table has been created based on standard chart setup tables that exist in Business Central’s base application.
The setup table is comprised of 3 fields:
- User ID – Field is used to be defined as a primary key field, makes it possible for each user to have their own settings set up.
- Chart Type – An option field, from which you can control the way the chart is displayed. The field has been copied from table 485 “Business Chart Buffer”, which is also going to be a SourceTable for our chart.
- Balance to Display – An option field, which will let the user select whether to calculate and display the “Balance” or “Balance (LCY)” fields.
Once the setup table has been created, a page based on the table has also been created:
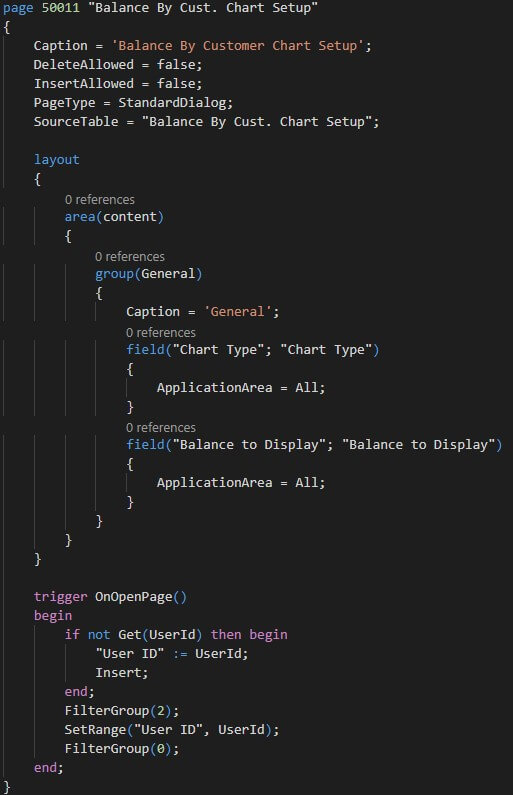
The page contains the two fields that can be edited by the user.
Trigger “OnOpenPage” has been copied from a standard “Trailing Sales Orders Setup” chart setup page. The purpose of this code is to create a unique record for the user in case there is none since this page only allows edits.
Creating a Chart Management Codeunit using Business Chart Control Add-In
The most basic form of a chart management codeunit using Business Chart Control Add-Ins can consist only of one function, which is a function that generates data for the chart to display.
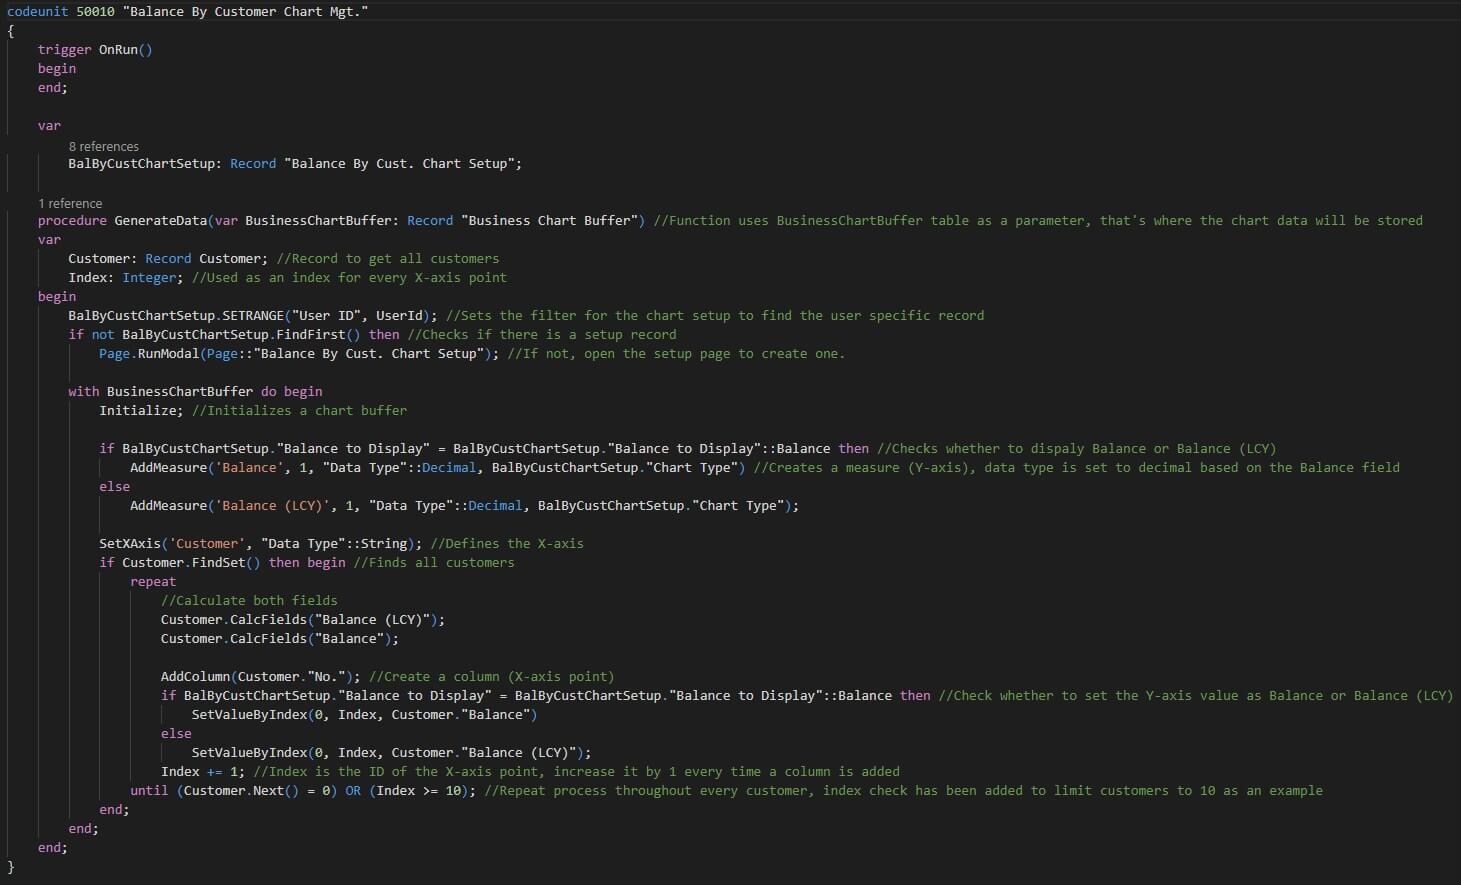
A single function was created, and the goal is to calculate the data and insert each column into the chart. The function starts by retrieving the needed setup record, and if it does not exist – remember that we have code in the setup page’s OnOpenPage trigger, which initializes the record. Therefore, the Client opens the page, in case no setup records for your user ID was found.
After the setup data has been retrieved, the code proceeds to initialize the business chart buffer record and, based on certain setup fields, defines a measurement and a chart type. The rest of the code loops through customer records and inserts each column by setting a value to each index (Column).
Creating a Chart Page using Business Chart Control Add-In
After every necessary component, aside from the page itself, has been created, a chart subpage can now be created by simply defining it as a CardPart type page.
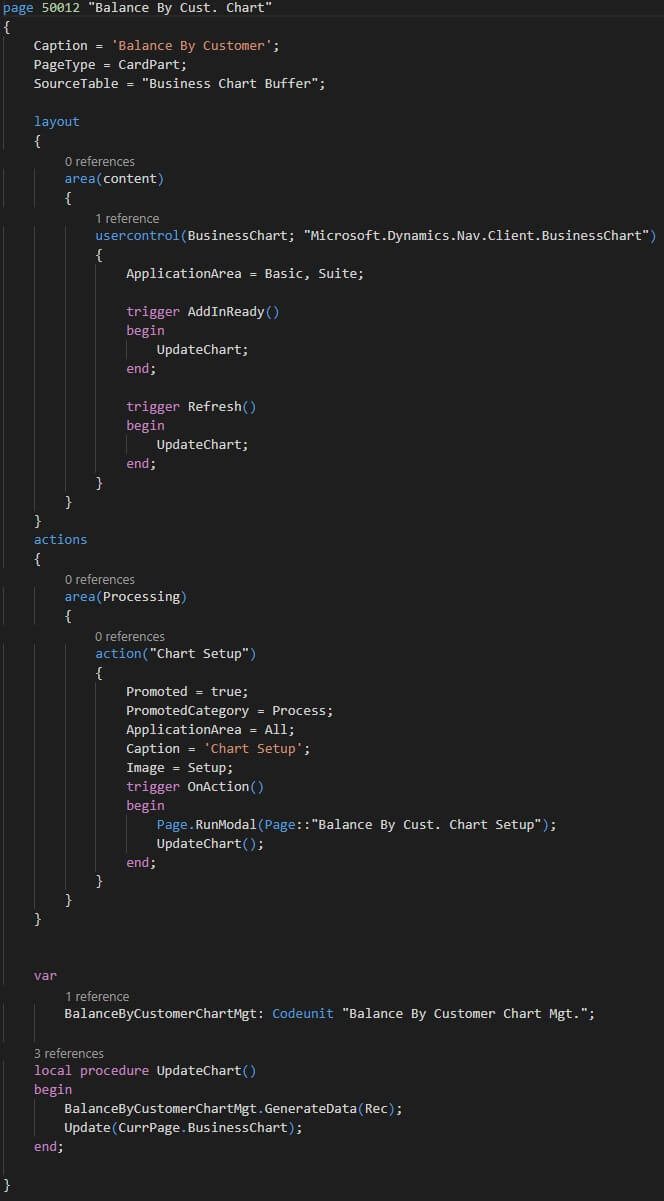
The page needs to have a BusinessChart control add-in and an update function to generate the data needed for the chart. The update function calls the previously declared “GenerateData” function from the management codeunit and updates the chart with the newly generated data. The whole “UpdateChart” function needs to be called in two triggers, which can be defined inside the control add-in: ‘AddInReady’ and ‘Refresh’.
Finally, the action was added to access the setup page in case the user wishes to change the chart type or balance type.
Deploying the Chart using Business Chart Control Add-In
After the chart has been created, it needs to be deployed somewhere as a page part. As an example, a page extension object has been created to insert the chart into the “Order Processor Role Center” page.

The page part of the chart page has been added after a chosen control object, the solution now needs to be compiled and published.
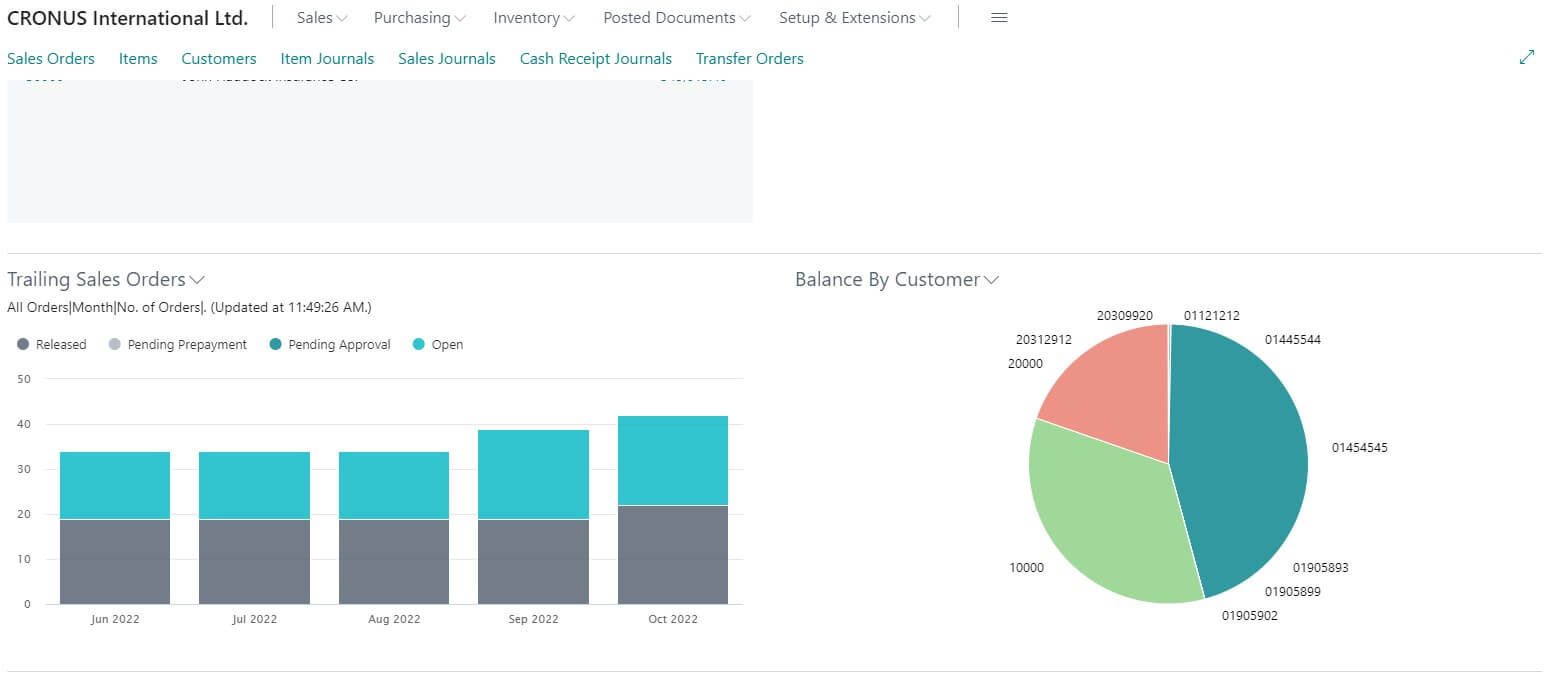
Results
The result of the extension is now a basic chart in our Role Center, which can be customized by clicking on “Balance By Customer” and accessing the “Chart Setup” action.

Adding a DrillDown to the Chart using Business Chart Control Add-Ins
In case a user would like to access a customer card by clicking on one of the chart’s columns, an additional trigger call needs to be added to the control add-in.
The Business Chart control add-in has a “DataPointClicked” trigger, which is called whenever a point or a column is selected by the user.
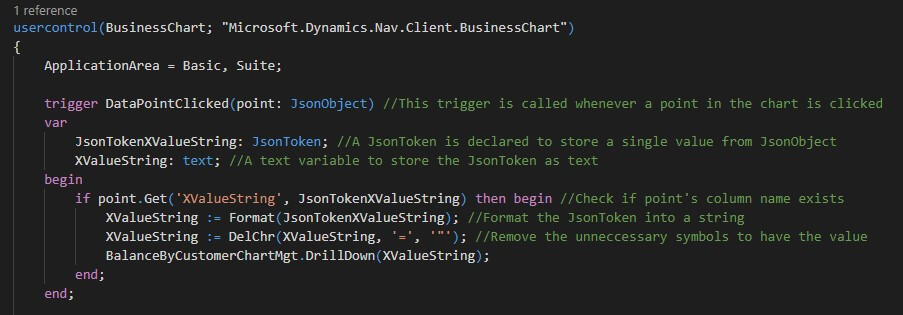
Inside a trigger, a DrillDown function is called from the management codeunit. This is the reason why the chart management codeunit has also been given the DrillDown function.
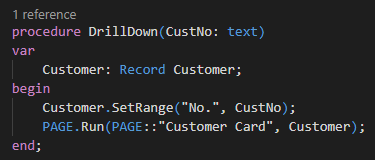
The final result is a customer card opened, depending on which point has been clicked by the user.
We hope that this introduction to Business Chart Control Add-In in Dynamics 365 Business Central gave you a hand in creating charts using the AL code.