Upgrading Dataports can be quite a difficult and challenging task as its structure has changed completely. All the experience and knowledge that you have in developing Dataports might be not so useful working with RTC equivalent – XMLports. Though both Dataports and XMLports are used for the same purpose – import and export data to and from NAV – Dataports are only able to perform this task with external text files. XMLports, however, have a new feature – they can deal not only with external text files, but also with XML format files (see example 1.1). For me that is an advantage, as it means more flexibility. So let‘s review some important issues that might be faced while developing XMLports. It is not so difficult once you have knowledge!
Recently Simplanova released ultimate NAV Upgrade tool pack. One of the tools – Simplanova Dataport Converter automatically converts Dynamics NAV Dataports to XMLports. You can test this tool for free – just Request Free Demo.
1. Basic structural changes between Dataports and XMLports
Example 1.1:
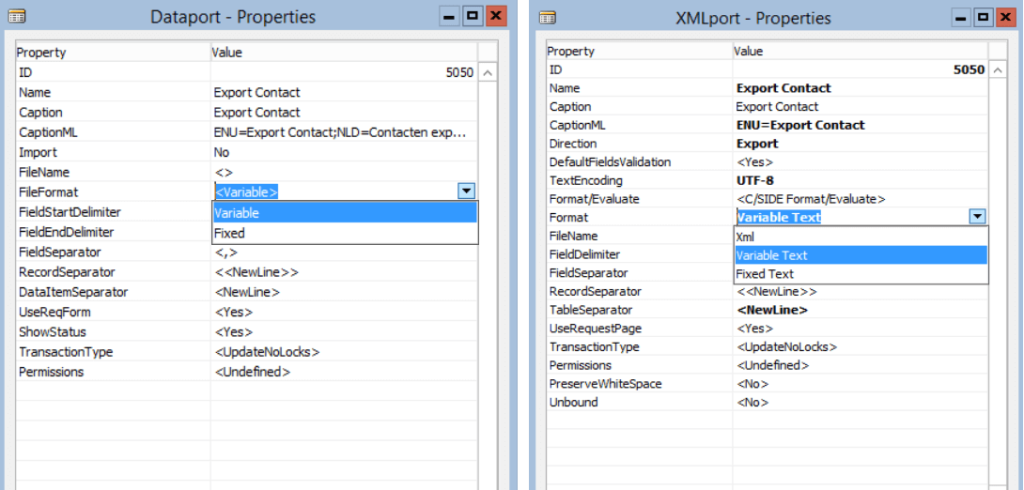
First of all, let’s get a closer look at basic structural changes between Dataports and XML ports. As I already mentioned XML ports are able to deal with XML files. What does it mean in NAV development environment? It means that DataItem structure that was used in Dataports are now changed to Nodes structure in XML ports. The important thing here is to never forget a Root node. It is a base node that has to be created in every XML port. After you have created a root node, all the other nodes can be created (do not forget that it is necessary to indent the following nodes from the root node).
2. From DataItem to node table
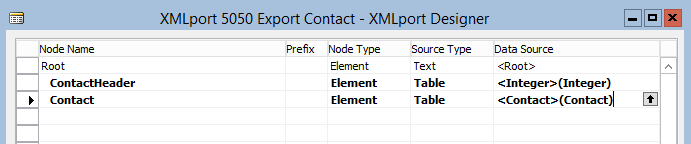
The next step to recreate a Dataport‘s structure in XML port is to create nodes for every DataItem. For that you should always use ‘Node Type‘ element and ‘Source Type‘ table (see example 2.1).
Example 2.1:
Dataport‘s structure:
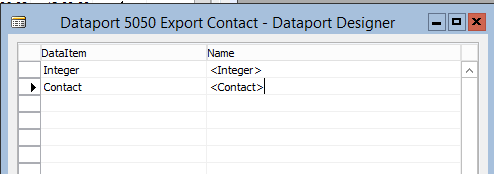
XMLport‘s structure:
3. Redesign of FIELDCAPTION function usage in Dataport fields
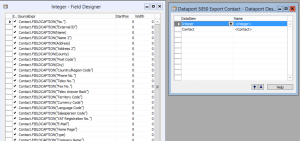
After DataItem nodes are created, let’s look into structural changes regarding DataItem fields. It was quite easy to define them in Dataport – you just select DataItem, go to View -> Dataport Fields. Field designer for desired DataItem opens and values can be defined there. The most common file structure for exporting data is the one where captions are defined in the first line of the file and all the related data is listed in the following lines. It is very convenient to use FIELDCAPTION function to define captions that will be needed for DataItem fields (see example 3.1).
Example 3.1:
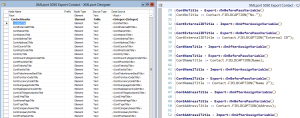
Sadly you can‘t define FIELDCAPTION function as a node in XMLport. In order to use fieldcaptions you have to create text nodes for every caption, and then write a simple piece of code which assigns a certain fieldcaption for that node (see example 3.2).
Example 3.2:
4. Recreation of DataItem table fields
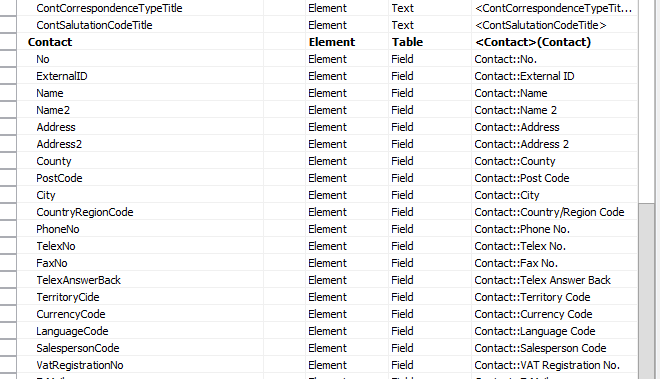
Once you are done with captions, you can move on to actual fields. It is quite easy with fields – you just create a node with ‘Node Type‘ element and ‘Source Type‘ field. The important thing to have in mind here is that you should define a source table name next to every field using the structure TableName::FieldName (see the example 4.1).
Example 4.1:
5. Correct code redesign
Now as we reviewed a Dataset design, we can move on to code. There are just as much changes in triggers of XMLports compared to Dataports. Though the XMLport trigger remains the same (see example 5.1), DataItem triggers are quite difficult to figure out from the first sight.
Example 5.1:
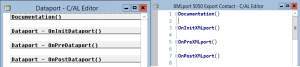
Let’s review most frequently used trigger for export:
OnPreDataItem: this Dataport trigger is replaced with Export::OnPreXMLItem trigger. It is typically used to set filters on the data and to initialize variables before finding the first record.
OnBeforeExportRecord: this Dataport trigger is replaced with Export::OnAfterGetRecord trigger in XML port. The usage of this trigger is the same in both versions – it is executed after the record is retrieved from table and before it is exported, so here you can manipulate the fields or perform any calculations of the variables that depend on the record.
Now let‘s move on to the most important ones for import:
OnPreDataItem: code of this trigger usually can be moved to Import::OnAfterInitRecord trigger. It is typically used to set up the preconditions for the record before it is inserted into the database table.
OnBeforeImportRecord: code from this trigger can ussualy be moved to either Import::OnAfterInitRecord or Import::OnBeforeInsertRecord, depending on what the code does. Import::OnBeforeInsertRecord trigger is typically used for manipulation of the record before it is inserted into the database table.
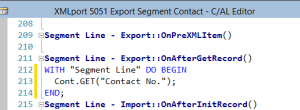
Lastly, it is very important not to forget the usage of WITH statement when coding. Xmlports are unable to identify the source table of DataItem when you are writing code in that DataItem‘s trigger. That‘s the difference from Dataports and also reports(classic and RTC version). This means that you always have to confirm a table‘s name in your code(see example 5.2).
Example 5.2:
Dataport‘s code:
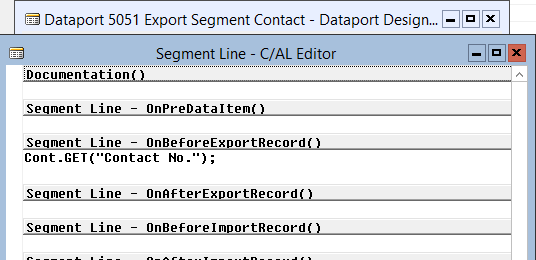
XMLport‘s code:

Effective usage of WITH statement in case there would be more code:
You can automate Dataports conversion to XMLports with Simplanova automated Dataport Upgrade Tool. Fill in the form below and get Free Demo.