Guidelines for Partners
Almost every Dynamics NAV / 365 Business Central solution uses multi-language functionality, allowing to display UI in different languages. Using C/AL – we have to fill in the CaptionML property with a desired translation. Using AL – we have to use the XLIFF file for the same purpose. Both achieve the same goal, but both are very different technologies. This article will guide you through translation files creation from the beginning to the end and give some useful tips on making this process easier and faster in Business Central.
If you are not familiar with XLIFF files, there is a great intro about working with translation files on Microsoft Learn.
Please note that we will go through the process used during the upgrade project (upgrading your solution from C/AL to AL version) – if you are developing your extension from scratch, some steps might be different or unnecessary. However, there are still some valuable tips in the article.
1. Translation files: preparation
Target translation files are automatically generated once objects are converted with txt2al (please note that there will be multiple translation files, and you will have to merge them if you are not converting all the objects at once). It would be great to use those files, but sadly it is usually not possible as most of your AL objects will be changed after the txt2al conversion – objects will be modified during compilation; maybe you will decide to add affixes, clean up your solution, or develop some new functionalities. Therefore, to have your translations up to date – it is best to save originally created translation files somewhere and perform the process described below at the very end of your upgrade project (once you know that your app will only have minimal modifications afterward and it will be easy to update translations manually).
2. Source file for translations
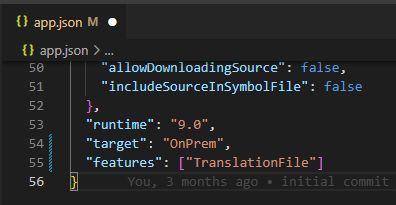
The first step is to generate a source translation file (a file that gives you information on all the values that can be translated in your extension). Source translation file is generated automatically when building an extension (Ctrl+ Shift +B) if you add the TranslationFile feature to your app.json:
The translations folder will be created, and the source translation file will be placed there. It looks like this:
The source language is en-US, as we know that ENU was a default language for the C/AL solution. The source file only contains <source> elements – it is possible to change the target language and add <target> elements right here in this file, but I recommend creating a new file for actual target translations. It is easier to manage translations and have more than one target language if you keep your original source file and target files separated.
3. Target file for translations: XLIFF Sync
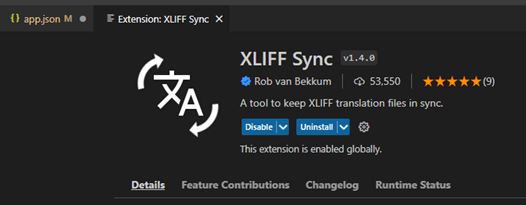
It is possible to make a copy of the source translation file, change the target language there and start adding <target> elements. That will, however, take some time if you have a larger solution, so I recommend using the great VsCode extension XLIFF Sync for all translation-related procedures:
XLIFF Sync is free of charge and can be found and installed using the Extensions marketplace in your VsCode.
All XLIFF commands can be accessed from the command palette (F1), so we can easily create a new target translation file:
Just select the target language, and the target file is automatically created:
The last thing that we need is to fill those <target> elements, so let’s move to the last step.
4. Translations
It would take lots of time to add all translation values manually (especially if you are upgrading from C/AL version and should check and copy all the values from C/AL solution), so we will use our original translation files (the ones that we saved after txt2al conversion) and XLIFF help for that.
Let’s call a command to import translations from the file:
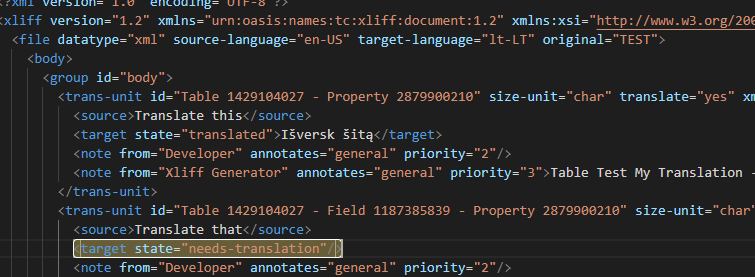
A window will pop up to select a file – choose the original translation file saved after txt2al conversion. After the import is completed, you will see that the target state is now “translated” and target translation is added:
There still might be some values not translated – it means that the source value was not found in the original translation file, so if needed – you will have to translate these manually.
NOTE: XLIFF Sync matches and imports translations based only on value in <source> element. It means that if you have some sources that are the same – the first target translation value will be picked up and applied everywhere. So, for example, if we have “Translate this” as a caption for a table and a caption for a field in another table, the first translation will be picked up from the original file (the one you are importing from) and applied to both values. That might be an issue if you want to translate the same captions differently.
5. Translation files: Useful tips
- Be aware that RAD publishing ignores all the translations, so you should do a full publish every time translation files are changed
- If you have values translated, but these translations do not show up in UI – it means there are some issues with the target translation file. It is very often caused by illegal symbols used in translation files – especially & symbol. Please note that & symbol is not allowed to be used –& has to be used instead.
- Translation not shown correctly in UI might also mean that both source and target translations have to be updated. For example, if you have done quite some modifications to your app – it is possible that <trans-unit id> values are now re-calculated and should be updated for your source and target files. In this case – go through the process once again (starting from step 2) – and you can use the target translation files that you currently have for import instead of the original files.
That’s it – let’s publish our app and check out the translations!


